DIY Home Inspection Checklist: A Complete Guide for Homeowners

Introduction
Most home problems do not appear overnight. They start small. A tiny crack in the foundation. A slow drip under the sink. A loose shingle on the roof. These issues quietly grow for months or even years before a homeowner notices them.
By then, what could have been a fifty-dollar fix has become a five-thousand-dollar repair.
That is exactly why a DIY home inspection checklist is one of the most valuable tools any homeowner can use. You do not need to be a licensed inspector to spot warning signs. You simply need to know what to look for, where to look, and how often to check.
Performing regular home inspections helps you stay ahead of maintenance issues, protect your family’s safety, preserve your home’s value, and avoid the financial stress that comes with unexpected major repairs. Studies show that proactive home maintenance costs significantly less over time than reactive emergency repairs.
This guide gives you a complete, room-by-room and system-by-system home inspection framework. Whether you are a new homeowner learning the basics or an experienced owner looking to sharpen your process, this checklist covers everything you need.
What Is a DIY Home Inspection?
A DIY home inspection is a systematic, self-performed evaluation of your home’s major systems, structures, and components.
It is not the same as a professional home inspection. Licensed inspectors carry specialized equipment, follow standardized protocols, and produce formal written reports used in real estate transactions. A DIY inspection is something different. It is an ongoing, proactive habit that gives you a clear picture of your home’s condition throughout the year.
Think of it like a regular health checkup. You do not wait until you feel seriously ill to see a doctor. The same logic applies to your home. Regular self-inspections let you catch small problems before they escalate.
A good DIY inspection walks through every major component of your home in a structured order. It covers the roof, exterior, foundation, attic, basement, crawl space, plumbing, electrical, HVAC, and every interior living space. Nothing gets overlooked because you are working from a checklist rather than relying on memory.
Why Regular Home Inspections Matter
Homes are complex systems. Each component affects others around it. A roof leak can damage attic insulation, which reduces energy efficiency, encourages mold growth, and eventually damages ceilings below. What started as one small issue creates a chain of problems.
Regular inspections break that chain early.
According to the U.S. Department of Housing and Urban Development, deferred maintenance is one of the leading causes of deteriorating housing conditions and declining property values in American communities. Staying ahead of maintenance through consistent inspection is one of the most effective ways homeowners can protect their investment.
Beyond property value, home inspections are about safety. Faulty electrical systems cause house fires. Undetected carbon monoxide leaks kill people. Water damage from plumbing failures creates toxic mold. These are not rare occurrences. They happen to real homeowners who simply did not know there was a problem.
Regular inspection gives you the knowledge to act before situations become dangerous.
Benefits of a DIY Home Inspection
Performing your own home inspections delivers practical benefits that pay off in real, measurable ways.
- Catches small maintenance issues before they become costly repairs
- Identifies safety hazards including fire risks, gas leaks, and electrical faults
- Extends the useful lifespan of major home systems
- Helps you prioritize your home maintenance budget effectively
- Documents the condition of your home over time for insurance and resale purposes
- Builds your knowledge of your home’s specific systems and components
- Reduces emergency repair costs by addressing issues during business hours rather than emergencies
- Gives you leverage and peace of mind when buying or selling a property
Homeowners who inspect regularly spend less on repairs annually than those who wait for problems to appear. The math strongly favors prevention.
When Should You Inspect Your Home?
Timing matters. Different seasons create different risks, and inspecting at the right times means you catch problems before they cause damage.
Twice a year is the minimum recommendation for a comprehensive inspection. Spring and fall are the ideal times.
Spring inspection catches damage from winter ice, snow, and freezing temperatures. Fall inspection prepares your home for the stress of cold weather ahead.
Beyond full inspections, certain systems deserve more frequent attention. HVAC filters should be checked monthly. Smoke and carbon monoxide detectors should be tested monthly. Gutters should be checked after major storms. Your plumbing should be monitored throughout the year.
Building your inspection schedule into a broader home maintenance calendar keeps everything organized and ensures nothing gets skipped. The Monthly Home Maintenance Checklist is an excellent resource for building that habit into your regular routine.
Essential Home Inspection Tools
You do not need expensive equipment to perform an effective home inspection. Most of what you need is already in your garage or easily available at a hardware store.
Flashlight
A quality flashlight is your most important inspection tool. You will use it constantly in attics, crawl spaces, basements, under sinks, behind appliances, and inside electrical panels. A bright LED flashlight with a long battery life is worth the investment. A headlamp is even better because it keeps both hands free.
Moisture Meter
A moisture meter measures moisture content in wood, drywall, and other materials. It helps you identify hidden water intrusion that is not yet visible to the naked eye. Moisture problems are at the root of mold, rot, and structural damage. A basic pin-type moisture meter costs under thirty dollars and can save you thousands by catching water problems early.
Ladder
A sturdy ladder gives you access to gutters, roof edges, attic hatches, and upper exterior walls. A six-foot step ladder handles most interior needs. An extension ladder is necessary for second-story exterior work. Always follow safe ladder practices and never inspect the roof by walking on it during a DIY inspection. Use binoculars or a drone instead.
Binoculars
Good binoculars let you inspect your roof surface, chimney, upper siding, and fascia boards safely from the ground. You can see missing shingles, damaged flashing, and deteriorating mortar without putting yourself at risk on the roof. This is the safest and most practical tool for roof monitoring between professional inspections.
Screwdriver
A flat-head and Phillips screwdriver have dozens of uses during an inspection. You can probe wood surfaces for soft spots that indicate rot, tighten loose outlet covers and switch plates, open electrical panel knockouts, and check the condition of door and window hardware.
Level
A simple four-foot bubble level helps you check whether floors, window sills, door frames, and countertops are level. Significant deviations can indicate foundation settlement or structural shifting. This is one of the most revealing tools for spotting foundation-related problems in living spaces.
Electrical Outlet Tester
An outlet tester plugs directly into receptacles and tells you whether each outlet is wired correctly, whether grounding is present, and whether GFCI protection is functioning properly. They cost less than fifteen dollars and are simple enough for any homeowner to use safely.
Camera or Smartphone
Photograph everything during your inspection. Document current conditions, note any concerns with a photo, and build a visual record of your home over time. This documentation is invaluable for insurance claims, contractor quotes, and future inspection comparisons. A smartphone camera works perfectly for this purpose.
Notebook or Inspection App
Record your findings systematically. Whether you prefer a simple paper notebook or a digital inspection app on your phone, keeping organized records means you never forget what you found or lose track of repairs you planned to address. Several free home inspection apps are available that allow you to assign priority levels to each issue.
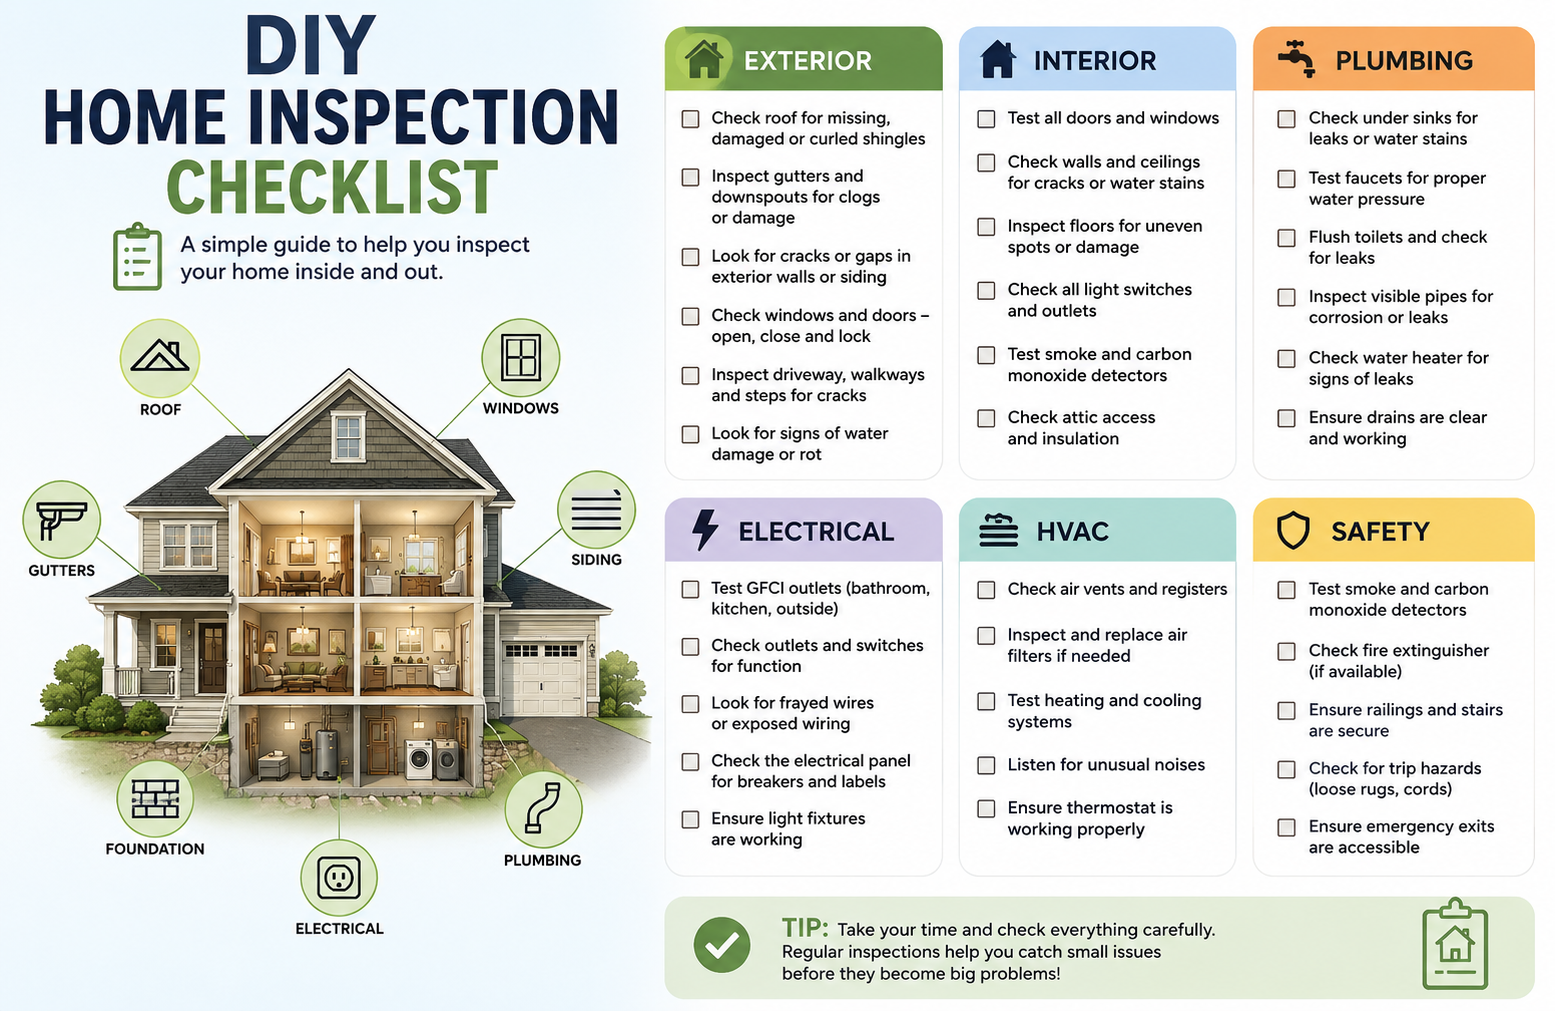
Complete DIY Home Inspection Checklist
Roof Inspection
Inspect from the ground using binoculars or from a second-story window when possible.
- Check for missing, cracked, curling, or blistering shingles
- Look for dark staining or moss growth indicating moisture retention
- Inspect flashing around chimneys, vents, and skylights for gaps or rust
- Check for sagging sections along the roofline
- Look for granule accumulation in gutters, which signals shingle deterioration
- Inspect fascia boards and soffits for rot, holes, or paint peeling
- Check that roof vents are open and undamaged
- Look for signs of animal entry at the roofline
Gutters and Downspouts
Clean gutters protect your roof, siding, and foundation. Refer to the complete guide on How to Clean Gutters Safely for detailed cleaning and inspection steps.
- Check for debris, leaf buildup, and standing water
- Inspect gutters for sagging, separation from fascia, or pulling away from home
- Check all gutter joints and seams for leaks or separation
- Confirm downspouts are securely attached and direct water away from foundation
- Look for erosion below downspout outlets
- Check splash blocks are in place and effective
Chimney Inspection
- Inspect chimney cap for cracks or missing sections from ground level
- Look for spalling or missing mortar in chimney brickwork
- Check flashing where the chimney meets the roof for gaps or deterioration
- Inspect the damper opens and closes freely from inside
- Check the firebox for cracks in the firebox lining
- Look for excessive creosote buildup inside the flue
- Schedule a professional chimney sweep every one to two years
Attic Inspection
- Check for daylight penetrating through the roof deck
- Look for water stains, wet insulation, or mold growth
- Inspect insulation for gaps, compression, or moisture damage
- Confirm attic vents are clear and functioning
- Check for pest evidence including droppings or nesting material
- Inspect rafters and trusses for cracking, splitting, or sagging
- Measure insulation depth to confirm adequate R-value for your climate zone
Exterior Walls and Siding
- Check siding for cracks, holes, warping, rot, or missing sections
- Look for gaps around windows, doors, and utility penetrations
- Inspect caulking around all exterior openings for cracks or separation
- Check paint condition for peeling, blistering, or significant fading
- Look for efflorescence on brick surfaces, which indicates moisture intrusion
- Inspect wood trim for rot using a screwdriver to probe suspected areas
- Check where siding meets the foundation for proper clearance and gaps
Foundation Inspection
- Walk the full perimeter looking for visible cracks in the foundation
- Distinguish between hairline shrinkage cracks (common) and wide horizontal or stair-step cracks (concerning)
- Check for signs of water infiltration including staining or white mineral deposits
- Look for areas where soil has settled or washed away against the foundation
- Confirm grade slopes away from the home at least six inches over ten feet
- Check basement walls for bowing, bulging, or inward movement
- Inspect where utilities enter the foundation for proper sealing
Windows and Doors
- Open and close every window and exterior door to test smooth operation
- Check for broken or cracked glass panes
- Inspect weatherstripping for compression damage or gaps
- Test locks and hardware on all windows and doors
- Look for signs of moisture between double-pane glass (fogging indicates seal failure)
- Check window sills for rot or paint peeling indicating water infiltration
- Inspect door thresholds for proper seal against weatherstripping
HVAC System Inspection
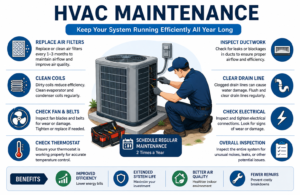
Your heating and cooling system deserves consistent attention. Replacing a dirty HVAC filter is one of the simplest and most impactful maintenance tasks a homeowner can perform. The complete guide to How to Replace an HVAC Filter walks through this process step by step.
- Check and replace air filter according to manufacturer recommendations
- Inspect visible ductwork for disconnected sections, gaps, or damage
- Test heating and cooling operation in all zones
- Check thermostat accuracy and battery condition
- Inspect outdoor condenser unit for debris accumulation and damage
- Listen for unusual noises during system startup and operation
- Check condensate drain line for clogs
- Schedule professional HVAC service annually
Plumbing Inspection
Plumbing problems are among the most damaging and expensive issues a home can face. For a thorough approach to ongoing plumbing maintenance, the Home Plumbing Maintenance: Complete Guide for Homeowners is an excellent resource to review alongside your inspection.
- Run every faucet and check for reduced water pressure or slow drainage
- Check under every sink for moisture, staining, or active leaks
- Inspect toilet base for soft flooring indicating water damage
- Test every toilet flush and check for running water after the cycle completes
- Check exposed pipes for corrosion, green staining, or mineral buildup
- Inspect washing machine hoses for bulging or cracking
- Locate and confirm the main water shutoff valve operates freely
- Check water pressure using an inexpensive gauge (ideal range is 40 to 80 psi)
Water Heater Inspection
- Check the unit age (standard water heaters last 8 to 12 years; tankless models up to 20 years)
- Inspect the tank exterior for rust, corrosion, or signs of leaking
- Check the pressure relief valve for proper operation
- Look for mineral deposits at connections indicating hard water buildup
- Inspect the flue connection for proper sealing on gas-fired units
- Confirm the temperature setting is at 120 degrees Fahrenheit to prevent scalding and reduce energy use
- Listen for rumbling or popping sounds during heating cycles, which indicate sediment buildup
Electrical System Inspection
- Open the main electrical panel and check for corrosion, burn marks, or double-tapped breakers
- Test every outlet with an outlet tester for proper wiring and grounding
- Confirm GFCI outlets are installed in kitchens, bathrooms, garages, outdoors, and near water sources
- Test GFCI outlets using the test and reset buttons
- Check for exposed wiring anywhere in the home
- Look for extension cords used as permanent wiring (a serious fire hazard)
- Inspect light switches for proper operation and warm or hot cover plates
- Check the panel for breakers that repeatedly trip
Smoke and Carbon Monoxide Detectors
The Consumer Product Safety Commission recommends testing smoke and carbon monoxide detectors monthly and replacing them according to manufacturer guidelines. For step-by-step instructions on proper testing, see How to Test Smoke Detectors.
- Test every smoke detector using the test button
- Test every carbon monoxide detector using the test button
- Check detector placement: smoke detectors on every floor and in every bedroom; CO detectors near sleeping areas
- Replace batteries annually or use detectors with sealed 10-year batteries
- Note the manufacture date and replace detectors older than 10 years
Basement Inspection
- Check for water staining along walls and floors indicating past flooding
- Use a moisture meter to test wall surfaces for hidden moisture
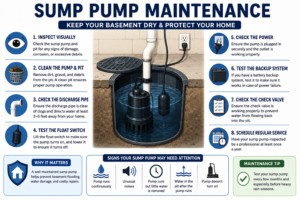
- Inspect sump pump operation if present and confirm the float switch activates properly
- Check floor drains for free flow
- Look for efflorescence on concrete block or poured concrete walls
- Inspect structural beams and posts for cracking, splitting, or insect damage
- Check visible plumbing pipes for corrosion and dripping
Crawl Space Inspection
- Check vapor barrier for tears, gaps, or missing sections
- Look for standing water or excessive moisture on the ground surface
- Inspect floor joists for rot, mold, or insect damage using a flashlight and screwdriver
- Check insulation installed between floor joists for sagging or moisture damage
- Inspect ductwork in the crawl space for disconnections or pest damage
- Look for evidence of pest activity including droppings, tunnels, or nesting
- Confirm vents are open in summer and sealed in winter based on your climate zone guidance
Kitchen Inspection
- Run the garbage disposal and listen for unusual grinding or vibration
- Check under the sink for moisture, staining, and signs of active leaks
- Test all burners on the cooktop and the oven heating element
- Inspect the dishwasher door seal and check under the unit for moisture
- Check the refrigerator door gaskets for a tight seal
- Inspect the range hood vent for proper operation and clean filters
- Check for loose or damaged flooring near the sink area
Bathroom Inspection
- Check caulking around the tub, shower, and toilet base for cracks or separation
- Press on tiles surrounding the tub and shower to check for soft spots indicating water damage behind
- Test exhaust fan operation and check that it actually vents to the exterior
- Look for staining on the ceiling below bathrooms on upper floors
- Inspect vanity cabinet interiors for moisture or evidence of leaks
- Test water temperature response to confirm proper mixing valve operation
- Check floor for soft spots near the toilet indicating subfloor moisture damage
Floors, Walls, and Ceilings
- Walk every floor area looking for soft spots, squeaks, or uneven sections
- Check ceiling surfaces for water stains, cracks, or sagging drywall
- Use a level to check floor surfaces for significant slope or unevenness
- Inspect wall surfaces for cracks, particularly diagonal cracks near door and window corners
- Check interior doors for proper latching and even gaps around the frame
- Look for gaps between baseboards and the floor suggesting floor movement
Garage Inspection
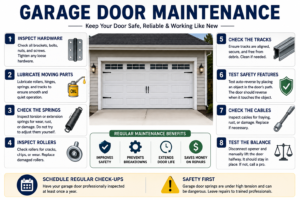
- Test automatic garage door auto-reverse safety function by placing a two-by-four flat on the ground in the door path
- Inspect garage door panels for dents, cracks, or warping
- Check the vehicle door between the garage and living space for a fire-rated door and proper self-closing function
- Look for fuel stains, oil drips, or chemical spills on the floor
- Inspect the garage ceiling for water stains or moisture coming from above
- Check that all electrical outlets in the garage are GFCI protected
- Inspect the garage floor for significant cracks indicating settlement
Deck, Porch, and Patio Inspection
- Test every deck board by pressing with your foot and probing with a screwdriver for soft spots
- Check all structural posts for rot at the base where they contact the ground or concrete
- Inspect ledger board connection to the house for proper flashing and secure fastening
- Test every baluster and rail post for movement or looseness
- Inspect stair stringers and treads for rot, cracks, or loose connections
- Check patio surface for significant cracking, lifting, or heaving sections
Driveway and Walkway Inspection
- Walk the full driveway and walkway looking for cracks, heaving, or sunken sections
- Check that surfaces slope away from the house to direct water away
- Look for large cracks allowing water infiltration that can cause freeze-thaw damage in cold climates
- Inspect steps for cracks, loose sections, or missing mortar
- Check handrails on exterior stairs for secure attachment
Lawn, Trees, and Drainage
- Walk your property perimeter confirming the grade slopes away from the foundation
- Look for areas of standing water after rain that indicate drainage problems
- Inspect trees for dead branches hanging over the roof or power lines
- Check for tree roots growing toward the foundation, driveway, or sewer line
- Look for signs of soil erosion near the foundation
Fencing and Gates
- Walk the fence line checking for leaning, loose, or missing sections
- Test every gate latch and hinge for proper operation
- Probe wood fence posts at ground level for rot
- Look for sections where fence panels separate from posts
- Check metal fence components for rust or structural weakness
Indoor Home Inspection Checklist
| Area | Key Items to Inspect | Frequency |
|---|---|---|
| Kitchen | Sink, disposal, appliances, cabinets, flooring | Seasonally |
| Bathrooms | Caulking, tiles, exhaust fan, fixtures, plumbing | Seasonally |
| Bedrooms | Windows, doors, outlets, flooring, ceiling | Annually |
| Living Areas | Flooring, walls, ceilings, fireplace, windows | Annually |
| Basement | Moisture, sump pump, structural elements, plumbing | Seasonally |
| Crawl Space | Vapor barrier, insulation, joists, pests, moisture | Annually |
| Attic | Insulation, ventilation, roof deck, rafters, pests | Annually |
| Electrical Panel | Breakers, wiring, labels, grounding | Annually |
| HVAC System | Filter, ducts, thermostat, equipment | Monthly/Annually |
| Smoke Detectors | Test function, battery, placement, age | Monthly |
| CO Detectors | Test function, battery, placement, age | Monthly |
| Water Heater | Tank condition, connections, PRV, temperature | Annually |
| Plumbing | Faucets, drains, visible pipes, water pressure | Seasonally |
Outdoor Home Inspection Checklist
| Area | Key Items to Inspect | Frequency |
|---|---|---|
| Roof | Shingles, flashing, vents, fascia, soffits | Seasonally |
| Gutters | Debris, flow, attachment, downspouts | Seasonally |
| Chimney | Cap, mortar, flashing, brickwork | Annually |
| Foundation | Cracks, moisture, grading, drainage | Seasonally |
| Siding | Cracks, rot, gaps, caulking, paint | Annually |
| Windows and Doors | Seals, weatherstripping, hardware, caulking | Seasonally |
| Deck and Porch | Boards, rails, posts, ledger, fasteners | Seasonally |
| Driveway | Cracks, drainage, steps, handrails | Annually |
| Garage | Door function, floor, electrical, entry door | Annually |
| Lawn and Trees | Drainage, dead limbs, roots, erosion | Seasonally |
| Fencing | Posts, panels, gates, rust, rot | Annually |
Seasonal Home Inspection Checklist
| Task | Spring | Summer | Fall | Winter |
|---|---|---|---|---|
| Roof and shingles | Required | After storms | Required | Visual only |
| Gutters and downspouts | Required | After storms | Required | Check for ice |
| Foundation check | Required | Optional | Required | Visual only |
| HVAC system | Required (cooling) | Mid-season check | Required (heating) | Monitor performance |
| Attic inspection | Required | Optional | Required | Check for ice dams |
| Plumbing system | Required | Optional | Required | Critical (freeze risk) |
| Windows and doors | Required | Optional | Required | Required (sealing) |
| Deck and porch | Required | Mid-season | Required | Visual only |
| Smoke/CO detectors | Required | Required | Required | Required |
| Water heater | Optional | Optional | Required | Required |
| Chimney | Required | Optional | Required | Monitor |
| Exterior caulking | Required | Optional | Required | Avoid |
| Crawl space | Required | Optional | Optional | Optional |
| Siding and paint | Required | Optional | Required | Visual only |
| Driveway and walks | Required | Optional | Required | Monitor for damage |
For a complete seasonal breakdown of maintenance tasks beyond inspection, the Ultimate Home Maintenance Checklist for Every Season provides a comprehensive framework for year-round home care.
Common Problems Found During Home Inspections
After performing countless home evaluations, certain problems appear more consistently than others.
Water intrusion is the most common and most destructive problem found during inspections. It appears in basements, around windows, in attics, and behind shower walls. Water damage leads directly to mold, rot, and structural deterioration.
Roof defects including missing shingles, damaged flashing, and deteriorating sealants are extremely common, especially on homes over fifteen years old. Many homeowners simply never look at their roofs and have no idea there is a problem until the ceiling starts leaking.
Electrical hazards such as double-tapped breakers, ungrounded outlets, missing GFCI protection, and improperly installed wiring are found in a significant percentage of homes, particularly those built before 1980.
HVAC neglect is another near-universal finding. Dirty filters, clogged condensate drains, deteriorating ductwork, and aging equipment that should have been replaced years ago show up consistently.
Foundation movement including settling, cracking, and moisture infiltration through foundation walls affects homes of every age. Catching foundation movement early, when repairs are simpler and less expensive, is one of the highest-value outcomes of regular inspection.
Deferred maintenance across multiple systems tells a consistent story: small problems that were ignored became large ones. The pattern repeats on roofs, decks, driveways, plumbing systems, and more.
DIY vs Professional Home Inspection
| Factor | DIY Home Inspection | Professional Home Inspection |
|---|---|---|
| Cost | Minimal (tools only) | $300 – $700+ per inspection |
| Frequency | Monthly, seasonally, annually | At purchase or as needed |
| Depth of Inspection | Visual, surface-level | Comprehensive, systematic |
| Equipment Used | Basic homeowner tools | Thermal imaging, gas detectors, moisture meters |
| Formal Report | Personal notes and photos | Detailed written report |
| Liability | Personal responsibility | Professional liability |
| Best Use | Ongoing maintenance monitoring | Real estate transactions, major repairs |
| Skill Required | Basic homeowner knowledge | Licensed professional training |
| Access Areas | Accessible areas only | Full attic, crawl space, panel access |
| Code Knowledge | Limited | Current building code standards |
| Time Required | 2 – 4 hours | 2 – 4 hours (professional pace) |
| Objectivity | May miss familiar problems | Unbiased third-party assessment |
DIY inspections and professional inspections are not competing options. They serve different purposes and work best together. Use DIY inspections for ongoing monitoring and professional inspections when buying, selling, or dealing with serious suspected problems.
Home Inspection Maintenance Schedule
| System or Area | Inspection Frequency | Professional Service Interval |
|---|---|---|
| Smoke and CO Detectors | Monthly | Replace per manufacturer (10 years max) |
| HVAC Filter | Monthly | Annual professional tune-up |
| Plumbing (visible) | Quarterly | As needed for repairs |
| Gutters | Twice yearly | As needed |
| Roof | Twice yearly | Every 3 – 5 years (professional) |
| Foundation | Twice yearly | If cracks worsen or water intrudes |
| Attic | Annually | As needed |
| Crawl Space | Annually | As needed |
| Electrical Panel | Annually | Every 5 – 10 years (professional) |
| Water Heater | Annually | Flush annually (professional or DIY) |
| Chimney | Annually | Annual sweep and inspection |
| Exterior Siding | Annually | As needed for repairs |
| Windows and Doors | Seasonally | As needed |
| Deck and Porch | Twice yearly | As needed |
| Driveway and Walks | Annually | As needed |
| HVAC System | Twice yearly | Annual professional service |
Estimated Repair Cost Table
| Common Problem | Early Detection Cost | Delayed Repair Cost |
|---|---|---|
| Missing shingles | $150 – $400 | $2,000 – $10,000+ (roof replacement) |
| Clogged gutters | $0 (DIY clean) | $500 – $5,000 (water damage) |
| Foundation crack (minor) | $300 – $800 | $5,000 – $30,000+ |
| Water heater replacement | $800 – $1,500 (planned) | $1,500 – $3,000+ (emergency) |
| HVAC filter replacement | $10 – $30 | $1,500 – $5,000 (system failure) |
| Electrical hazard fix | $100 – $500 | $5,000 – $50,000+ (fire damage) |
| Caulking windows | $20 – $60 | $500 – $3,000 (rot, mold) |
| Deck board replacement | $200 – $800 | $5,000 – $15,000 (full rebuild) |
| Plumbing leak repair | $150 – $400 | $2,000 – $20,000 (water damage) |
| Mold remediation (early) | $500 – $1,500 | $5,000 – $30,000+ (widespread) |
The cost comparison makes the case clearly. Early detection saves money every time without exception.
Expert Recommendations
After years of conducting home evaluations and helping homeowners build better maintenance habits, a few recommendations stand out as consistently impactful.
Document everything photographically. Start a photo record of every area of your home during your first inspection. Repeat it every time you inspect. Comparing photos from one year to the next reveals changes that would be nearly invisible during a single inspection.
Inspect after every major weather event. Wind, hail, heavy snow, and flooding all have the potential to cause immediate damage. Make a quick walk-around inspection within 24 hours of any significant storm.
Pay closest attention to water. Water is responsible for the majority of serious home damage. In every area you inspect, your primary question should be: where is water going, and is it going where it should?
Use the seasonal approach consistently. Inspecting in the same systematic order twice a year builds familiarity with your home and makes it easier to spot changes. The Fall Home Maintenance Checklist and Spring Home Maintenance Checklist are designed to complement this inspection process and ensure nothing falls through the cracks between seasons.
Build a relationship with trusted tradespeople before you need them. Know which electrician, plumber, and roofer you would call if an inspection revealed a serious problem. Finding reliable contractors during an emergency is far harder than having them already vetted.
Do not ignore small things. A single loose caulk joint, a slightly soft deck board, or a minor drip under a sink are easy to set aside for later. Later often becomes too late. Address small findings within thirty days.
The Environmental Protection Agency strongly recommends that homeowners routinely inspect for moisture and mold conditions throughout their homes, noting that prompt action when moisture problems are identified prevents significant health and structural damage. Building a moisture check into every seasonal inspection directly addresses this guidance.
Frequently Asked Questions
How long does a DIY home inspection take?
A thorough DIY home inspection of an average-sized home takes between two and four hours when done systematically. Larger homes or those with multiple outbuildings, complex systems, or noted problem areas may take longer. First-time inspectors typically take more time because they are learning the process as they go. Over time, as you build familiarity with your specific home, inspections become faster and more focused. Rushing an inspection defeats its purpose. Budget adequate time and work through each area methodically rather than rushing to finish.
What is the most important thing to check during a home inspection?
While every system matters, water management deserves the most attention in any home inspection. Water is responsible for the majority of structural damage, mold growth, and expensive repairs in residential homes. During your inspection, trace every possible water pathway: rain coming off the roof, water flowing through gutters, drainage at the foundation, plumbing inside walls, and moisture accumulating in crawl spaces and basements. If you can confirm that water is being properly managed throughout your home, you have addressed the most significant source of potential damage.
How do I check for mold during a DIY inspection?
Start with your nose. A musty, earthy odor in any room or enclosed space strongly suggests mold presence. Visually, look for discoloration on walls, ceilings, and around window frames, particularly in bathrooms, basements, crawl spaces, and attics. Use a moisture meter to check areas that look discolored but may not show visible mold growth. Pay close attention to areas behind furniture placed against exterior walls and inside closets on exterior walls. If you find visible mold covering an area larger than ten square feet, consult a professional remediation specialist rather than attempting DIY removal.
Can a DIY home inspection replace a professional inspection?
No. A DIY home inspection is a valuable maintenance tool, but it does not replace a professional inspection when one is truly needed. Licensed home inspectors bring standardized training, specialized tools like thermal imaging cameras and gas leak detectors, and deep knowledge of building codes and construction standards. Professional inspections are essential when buying or selling a home, after major damage events, or when you suspect serious structural, electrical, or plumbing issues. Think of DIY inspections as regular health monitoring and professional inspections as the equivalent of a comprehensive physical examination with a specialist.
How do I know if a foundation crack is serious?
Not all foundation cracks are equally concerning. Thin hairline cracks running vertically in poured concrete foundations are usually caused by normal concrete shrinkage during curing and are generally not structural. However, horizontal cracks in basement walls, wide cracks greater than one quarter inch, stair-step cracks in block foundations, and cracks that are actively widening over time are all serious warning signs requiring professional structural evaluation. If you can insert a quarter into a crack, it warrants professional attention. Photograph and measure cracks during each inspection to track whether they are changing.
What should I do if I find a problem during my inspection?
First, assess whether the issue poses an immediate safety risk. Active electrical hazards, gas odors, or structural instability require immediate professional attention and may require you to temporarily vacate the affected area. For non-emergency issues, document the problem thoroughly with photos and measurements and add it to your maintenance priority list. Research whether the issue falls within DIY capability or requires a licensed contractor. Get at least two or three professional quotes for any significant repair. Address problems promptly rather than deferring them, since most home maintenance issues worsen and become more expensive with time.
How do I inspect areas I cannot easily access like the attic or crawl space?
Use proper personal protective equipment before entering confined spaces. For attic inspections, wear an N95 respirator mask to protect against insulation fibers and mold spores, use safety goggles, and wear long sleeves and gloves. Walk only on structural members, never on insulation between joists, to avoid falling through the ceiling below. In crawl spaces, wear a respirator, protective clothing, and knee pads. Use your flashlight systematically, working from the entry point toward the far corners. If access is physically difficult or hazardous, a professional inspector with appropriate tools and training is the safer choice.
How often should I inspect my water heater?
Perform a basic visual inspection of your water heater every six months. Check the exterior for rust, moisture at connections, and corrosion around fittings. Test the pressure relief valve annually by lifting the lever briefly to confirm it releases properly. Check the temperature setting twice a year and confirm it remains at 120 degrees Fahrenheit. Flush the tank annually to remove sediment that reduces efficiency and accelerates corrosion. Note the age of your unit, as standard tank water heaters typically begin failing between eight and twelve years of age. Plan for replacement proactively rather than waiting for emergency failure.
What exterior issues cause the most interior damage?
Failed roof flashing and missing or damaged shingles allow water into attics, which leads to insulation damage, mold, and interior ceiling leaks. Clogged gutters that overflow send water against the siding and foundation, leading to both exterior rot and basement water intrusion. Missing or cracked exterior caulking around windows and doors allows water infiltration that causes rot in framing, damage to interior finishes, and mold in wall cavities. Grade problems that allow soil to slope toward the foundation are consistently linked to basement moisture problems. Maintaining the exterior is fundamentally about protecting everything inside.
Do I need special tools to test my electrical system safely?
You can safely perform basic electrical inspection with simple, inexpensive tools. An outlet tester costs under fifteen dollars and tells you immediately whether outlets are correctly wired and grounded without requiring you to open anything. A non-contact voltage tester can detect live voltage in wires without making direct contact, which is important for safety. You can visually inspect your electrical panel with a flashlight to look for obvious concerns like burn marks, corrosion, or double-tapped breakers. However, never open or touch internal panel components without professional training. If your inspection reveals concerns, hire a licensed electrician for deeper evaluation.
Conclusion
A home is most homeowners’ largest and most important financial asset. Protecting it does not require constant worry or expensive professionals for every task. It requires a consistent, systematic approach to inspection and maintenance.
The DIY home inspection checklist in this guide gives you the framework to stay ahead of problems, catch issues while they are still small, and make informed decisions about where to invest your maintenance budget.
Start with the systems that matter most: your roof, foundation, plumbing, electrical, and HVAC. Work outward from there. Build the habit of inspecting twice a year at minimum, and supplement that with the monthly and quarterly tasks that keep critical systems functioning properly.
Your future self will thank you every time a small, inexpensive fix prevents a large, disruptive repair. That is the true value of proactive home inspection. Not just saving money, but staying in control of your home rather than letting your home control you.
For homeowners ready to build a complete maintenance system around their inspection findings, the Annual Home Maintenance Checklist provides the broader framework that connects inspection discoveries to a full year of organized home care.