How to Build a Simple Shoe Rack: A Complete Beginner’s Guide

Introduction
If shoes pile up near your front door every single day, you are not alone. Scattered footwear is one of the most common household frustrations, and it is also one of the easiest to solve. Building a simple shoe rack is a practical, affordable, and genuinely satisfying DIY project that tackles the problem directly.
A shoe rack brings order to cluttered entryways, disorganized closets, and wasted floor space. It gives every pair of shoes a designated spot, which means less searching and less tripping. You can place a shoe rack in an entryway, mudroom, bedroom closet, garage, hallway, or even slide a low-profile version under a bed.
The best part about building your own is the control it gives you. You decide the size, the number of tiers, the material, the finish, and the overall style. A store-bought rack may not fit your space perfectly. A rack you build yourself can.
This project is beginner-friendly. It requires only basic tools, common lumber, and a few hours of your time. Whether this is your first woodworking project or your tenth, this guide walks you through every step clearly and practically.
What Is a Simple Shoe Rack?
A simple shoe rack is a freestanding structure designed to store and organize footwear off the floor. It is not permanently attached to the wall and does not require built-in cabinetry or complex carpentry skills.
Unlike a built-in shoe cabinet with doors, drawers, and enclosed storage, a simple shoe rack uses an open design. This makes it easier to build, easier to move, and easier to maintain.
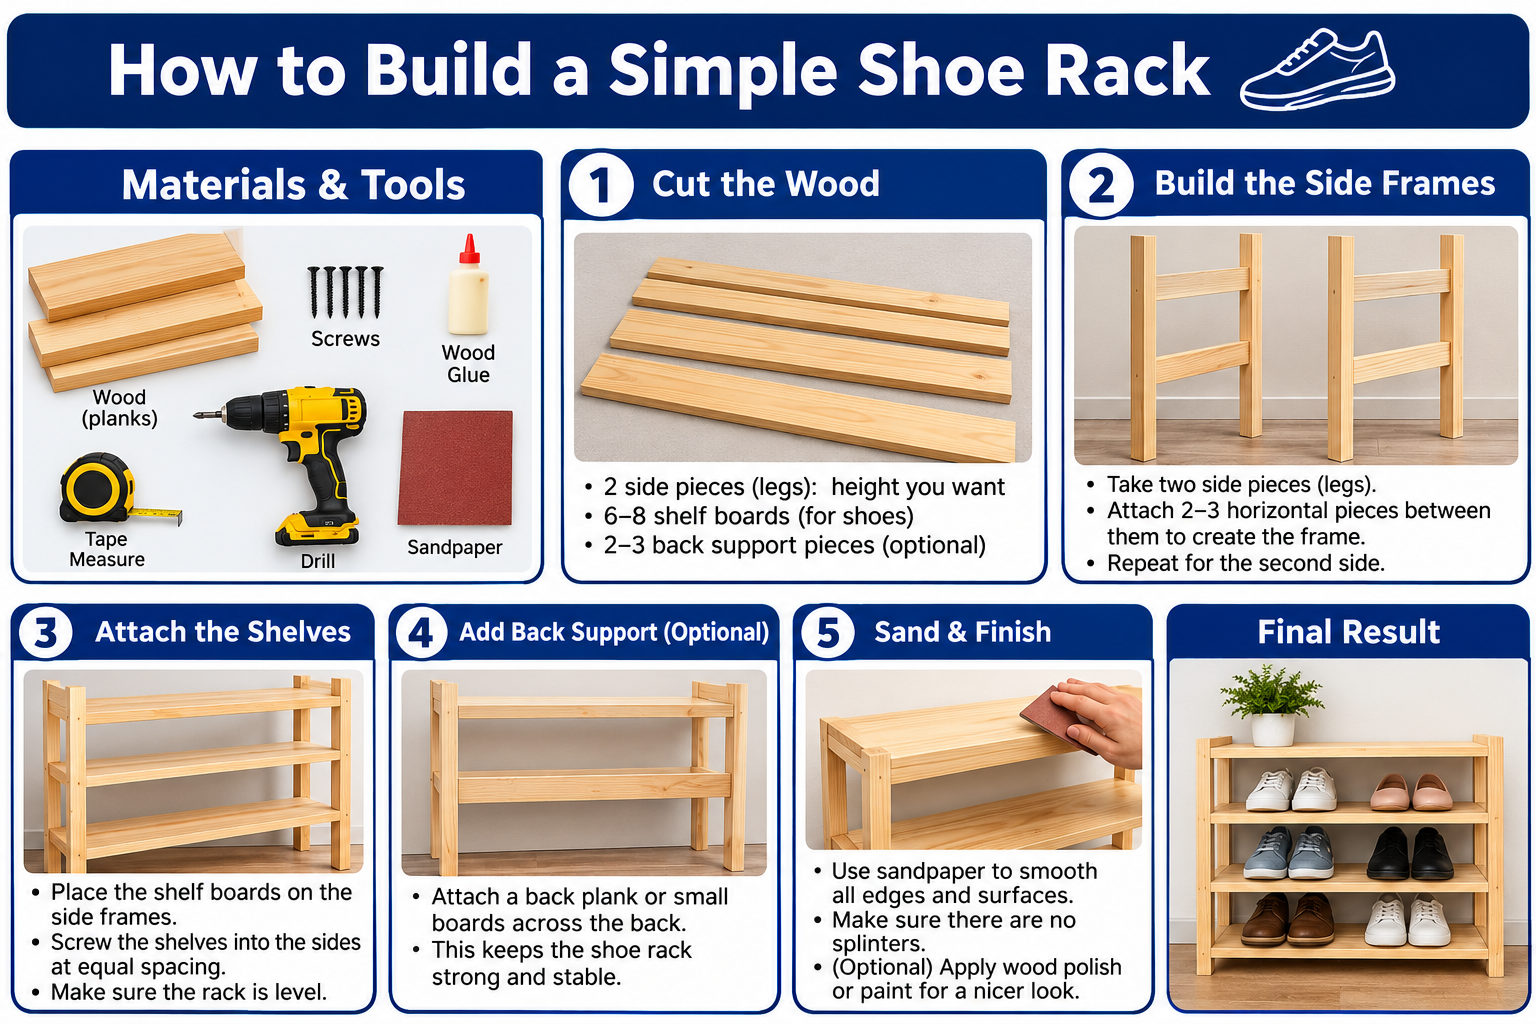
The basic structural components of a simple shoe rack include:
- Side panels or legs that form the frame
- Horizontal shelves or dowel rails that hold the shoes
- Screws or wood glue that connect the pieces
- Optional back panel for added stability
- Optional top shelf for bags, hats, or accessories
- Rubber feet to protect the floor and prevent sliding
Most beginner shoe rack builds use a flat-shelf or dowel-rail design. Both are straightforward to construct with common tools and standard lumber.
Why Build Your Own Shoe Rack?
Building your own shoe rack costs significantly less than buying a comparable unit from a furniture store. A simple wooden rack can be built for a fraction of the retail price, especially if you already own basic tools.
Beyond cost, customization is the biggest advantage. You can build a rack that fits an awkward corner, matches your existing furniture finish, or holds exactly the number of pairs your household needs.
You also control the quality. Store-bought shoe racks are often made from particleboard or thin metal that wears quickly. When you build your own, you choose solid wood or quality plywood that holds up over time.
There is also genuine satisfaction in using something you built yourself. A shoe rack you made from scratch serves a practical purpose every single day, which makes the time invested very worthwhile.
Where Should You Put a Shoe Rack?
Entryway
The entryway is the most natural location. A shoe rack placed just inside the front door catches footwear before it spreads through the house. Keep the rack proportional to the space. A narrow entryway benefits from a slim, vertical design rather than a wide flat one.
Mudroom
Mudrooms handle heavier traffic and messier shoes. Choose a material with a sealed or painted finish that resists moisture and dirt. A mudroom rack often benefits from extra tiers to accommodate work boots, rain boots, and athletic shoes.
Bedroom Closet
A closet shoe rack keeps pairs organized and visible. Measure the closet floor space carefully before building. A rack that is even an inch too wide will not fit through a standard closet door.
Garage
Garages expose the rack to humidity, temperature swings, and oily or dirty shoes. Cedar or sealed plywood holds up better than MDF in this environment. Place rubber feet under the rack to lift it slightly off a potentially damp concrete floor.
Hallway
A hallway shoe rack works well in homes without a dedicated entryway. Keep the depth shallow so the rack does not create a tripping hazard in a narrow passage.
Under a Bed
An under-bed shoe rack needs to be low-profile, typically no more than 5 to 6 inches tall. A rolling version with casters makes it easy to pull out and push back in. This design works well for seasonal shoes or guest room storage.
How to Plan Your Shoe Rack
Good planning is what separates a smooth build from a frustrating one. Before you cut a single board, answer these questions.
How many pairs of shoes does the rack need to hold? Count them. Add a few extra spaces for growth. Who will use the rack? Adults need deeper tiers than children. A mixed household may need a combination of both.
Measure the available floor space precisely. Account for wall clearance and door swing. Decide how many tiers you want and how tall the overall rack should be. Consider ceiling height and door clearance if the rack will live in a closet.
Choose your preferred style, material, and finish before you purchase anything. Setting a budget upfront helps you choose materials without overspending.
Sketch a simple drawing with the planned dimensions. A rough pencil sketch on paper is all you need. This becomes your building guide and prevents costly cutting errors.
Shoe Rack Styles and Designs
Flat Shelf Shoe Rack
Flat horizontal shelves are the simplest and most common design. Shoes sit flat on each shelf. This style is easy to build and works with any shoe type.
Angled Shoe Rack
Angled racks tilt each shelf forward slightly, which saves space and displays shoes at a convenient angle. The build is slightly more complex but still manageable for beginners.
Dowel-Style Shoe Rack
Dowel racks use horizontal wooden rods instead of solid shelves. Shoes hang over the dowels by their heels. This design uses less material, allows better airflow, and looks clean and modern.
Stackable Shoe Rack
Stackable units are built as individual modules that can be added or removed. This gives you flexibility to expand storage as needed without rebuilding the entire rack.
Shoe Rack with Top Shelf or Bench Seat
A rack with a sturdy top shelf can double as a surface for bags or a seat for putting on shoes. This style requires a thicker top panel and reinforced joinery to handle sitting weight safely.
| Style | Difficulty | Best For | Space Efficiency | Estimated Cost | Appearance |
|---|---|---|---|---|---|
| Flat Shelf | Beginner | All shoe types | Moderate | $20–$60 | Classic, simple |
| Angled | Beginner–Intermediate | Heels, sneakers | High | $25–$70 | Modern, neat |
| Dowel-Style | Beginner | Everyday shoes | High | $15–$50 | Open, airy |
| Stackable | Intermediate | Growing collections | Very High | $30–$90 | Flexible, modular |
| With Bench Seat | Intermediate | Entryways, mudrooms | Moderate | $50–$150 | Functional, furniture-style |
Choosing the Right Wood and Materials
The material you choose affects durability, workability, cost, and how the finished rack looks. Each option has real strengths and real limitations.
Pine is affordable, widely available, and easy to cut and sand. It is an excellent choice for a first woodworking project. Pine does dent more easily than hardwoods, but it finishes well with paint or stain.
Plywood is strong, stable, and resistant to warping. It works well for flat-shelf designs and can be cut to any dimension. The edges need to be filled or banded for a clean finished look.
Poplar is smooth, machines cleanly, and takes paint beautifully. It is a step up from pine in terms of surface quality and is still reasonably priced.
Cedar resists moisture and odor naturally, making it a smart choice for a mudroom or garage rack. It has a pleasant natural appearance that looks great with a clear sealer.
MDF has a very smooth surface that paints well, but it is heavy and does not tolerate moisture. Avoid MDF for racks in damp locations.
Hardwoods like oak and maple are very durable and beautiful but cost more and require sharper tools. They are better suited to intermediate or experienced builders.
| Material | Durability | Best Use | Workability | Est. Cost | Finish Options |
|---|---|---|---|---|---|
| Pine | Moderate | Indoor dry locations | Very Easy | $2–$4/bd ft | Paint, stain, seal |
| Plywood | High | All locations | Easy | $30–$80/sheet | Paint, veneer, seal |
| Poplar | Moderate–High | Painted indoor racks | Easy | $3–$5/bd ft | Paint, light stain |
| Cedar | High | Mudroom, garage | Easy | $4–$7/bd ft | Clear seal, oil |
| MDF | Moderate | Dry indoor only | Easy | $25–$50/sheet | Paint only |
| Oak/Maple | Very High | Long-term, high-use | Moderate–Hard | $6–$12/bd ft | Stain, oil, seal |
Tools and Materials You Need
| Tool or Material | Purpose | Recommended Use | Est. Cost |
|---|---|---|---|
| Lumber or Sheet Material | Main structure | All builds | Varies |
| Wood Dowels | Shelf rails (dowel style) | Dowel-style racks | $5–$15 |
| Wood Screws | Joins pieces together | All builds | $4–$10 |
| Wood Glue | Strengthens joints | All builds | $5–$12 |
| Sandpaper (80, 120, 220 grit) | Smooths surfaces | All builds | $5–$15 |
| Tape Measure | Accurate measurement | All builds | $5–$20 |
| Pencil | Marks cut lines | All builds | Under $2 |
| Speed Square | Checks 90-degree angles | All builds | $7–$20 |
| Circular Saw or Miter Saw | Cuts lumber to length | All builds | $50–$300 |
| Drill | Drives screws, bores holes | All builds | $30–$150 |
| Drill Bits | Creates pilot and clearance holes | All builds | $5–$30 |
| Countersink Bit | Recesses screw heads | All builds | $5–$15 |
| Clamps | Holds pieces during glue-up | All builds | $10–$40 |
| Level | Ensures rack sits flat | All builds | $5–$25 |
| Safety Glasses | Eye protection | All builds | $5–$15 |
| Hearing Protection | Protects hearing from power tools | Power tool use | $5–$20 |
| Paint, Stain, or Sealant | Protects and finishes wood | Optional | $10–$35 |
| Rubber Feet or Felt Pads | Protects floor, prevents sliding | All builds | $3–$10 |
The tools you actually need depend on your chosen design and materials. A simple dowel-style rack made from pine requires far fewer tools than a stackable plywood unit with a bench top.
Shoe Rack Dimensions Guide
| Rack Type | Width | Depth | Tier Height | Overall Height | Pairs Per Tier |
|---|---|---|---|---|---|
| Standard Adult | 30–36 in | 12–14 in | 6–7 in | 20–30 in | 3–4 pairs |
| Kids’ Shoe Rack | 24–30 in | 8–10 in | 4–5 in | 15–20 in | 4–5 pairs |
| Boot Rack | 30–36 in | 14–16 in | 10–12 in | 24–36 in | 2–3 pairs |
| Slim/Narrow Rack | 18–24 in | 10–12 in | 6–7 in | 20–30 in | 2–3 pairs |
| Under-Bed Rack | 24–36 in | 12–14 in | 5–6 in | 5–6 in | 3–4 pairs |
Adjust all dimensions to fit your specific space and the shoe sizes your household uses most. A rack sized around the largest shoes in the house will comfortably fit all smaller sizes as well.
How to Build a Simple Shoe Rack Step by Step
Step 1: Plan Your Design and Dimensions
Start with a clear sketch. Write down the finished dimensions for the width, depth, height, and number of tiers. A plan on paper prevents expensive mistakes at the saw.
Step 2: Create a Cut List
A cut list is simply a written list of every piece of wood you need, with its dimensions labeled. This tells you exactly how much lumber to buy and how to cut it efficiently to minimize waste.
Step 3: Purchase Your Materials
Take your cut list to the lumber yard or home improvement store. Buy a little extra material as a buffer in case of cutting errors. Check boards for straightness before purchasing.
Step 4: Set Up Your Workspace Safely
Clear your work area completely. Make sure you have good lighting, a stable work surface, and enough room to move around safely. Keep your tools organized and within reach. Following safe workshop habits from the start is covered well in the guide to home maintenance tools every homeowner needs.
Step 5: Measure and Mark the Lumber
Use a tape measure and pencil to mark each cut line clearly on the wood. Double-check every measurement before marking. The old saying “measure twice, cut once” exists for a very good reason.
Step 6: Cut the Side Panels
Cut both side panels to the same length. Using a speed square as a guide helps keep the cut line straight and square. If you are using a miter saw, the fence does this work for you automatically.
Step 7: Cut the Shelf Rails or Dowels
Cut all horizontal shelves or dowels to the same length. Cutting identical pieces together, one right after another, keeps them consistent. Stack them and compare before moving on.
Step 8: Sand All Pieces Before Assembly
Sand every piece individually before assembly using 80-grit sandpaper followed by 120-grit. It is much easier to sand flat boards than to sand inside corners after the rack is built. Finish with 220-grit for a smooth surface.
Step 9: Mark the Shelf Positions on the Side Panels
Hold both side panels together and mark the shelf positions at the same time. This guarantees the shelves will align perfectly on both sides. Use a pencil and square to draw clear reference lines.
Step 10: Pre-Drill Pilot Holes
Drill pilot holes at every screw location using a drill bit slightly smaller than your screw diameter. Pilot holes prevent the wood from splitting when you drive the screw. Use a countersink bit to recess the screw head flush with the surface.
Step 11: Apply Wood Glue to the Joints
Apply a thin, even layer of wood glue to the contact surface before driving any screws. Wood glue adds significant strength to the joint. Screws alone hold the position while the glue cures.
Step 12: Attach the First Shelf or Rail
Start with the bottom shelf. Align it with your reference marks, apply glue, clamp it in place, and drive the screws. Starting at the bottom gives the structure a stable base to build from.
Step 13: Check for Square
After attaching the first shelf, use a speed square to check that the corner angle is exactly 90 degrees. A rack that is not square will wobble and lean. Correct it now before adding more shelves.
Step 14: Attach the Remaining Shelves or Rails
Work your way up from the bottom shelf. Attach each shelf one at a time, checking for square at each stage. Clamp each joint before driving screws to prevent the pieces from shifting.
Step 15: Allow the Glue to Cure
Set the assembled rack aside and let the glue cure fully. Most wood glues reach full strength in 24 hours. Do not load the rack or move it aggressively during this time.
Step 16: Fill Screw Holes if Desired
If you plan to paint the rack, fill screw holes with wood filler or putty. Allow it to dry, then sand smooth. This creates a cleaner painted surface. If you are staining, you can leave the holes or use a matching wood plug instead.
Step 17: Sand the Assembled Rack
Sand the entire assembled rack with 120-grit paper, then finish with 220-grit. Pay attention to any rough edges, glue squeeze-out, or uneven surfaces. A well-sanded surface makes a dramatic difference to the final finish.
Step 18: Apply Your Chosen Finish
Apply paint, stain, or sealant according to the product instructions. Work in a well-ventilated area. Apply thin coats and allow each coat to dry fully before adding another. Two thin coats always look better than one thick coat.
Step 19: Attach Rubber Feet or Felt Pads
Attach rubber feet to the bottom corners of the rack. These protect your floor from scratches and keep the rack from sliding when someone pulls a shoe off a shelf.
Step 20: Allow the Finish to Cure Before Loading
Even after the finish feels dry to the touch, it may not be fully cured. Allow at least 24 to 48 hours before loading the rack with shoes, depending on the product used. Check the finish manufacturer’s recommendations.
How to Build a Shoe Rack Without Power Tools
You do not need power tools to build a simple shoe rack. A hand saw, a manual screwdriver or hand drill, sandpaper blocks, and clamps are enough to complete a basic build.
Hand sawing takes more time and physical effort than using a circular saw, but the result can be just as accurate when you follow the cut line carefully. Use a miter box to guide the hand saw for cleaner, straighter cuts.
Pre-drilling with a hand drill is slower but gives you full control over the hole depth and angle. Take your time with each hole.
The main trade-off is time. A build that takes two hours with power tools may take four to six hours by hand. For a beginner who does not yet own power tools, hand tools are a perfectly valid and safe way to complete this project.
How to Build a Shoe Rack for a Small Space
Small spaces require creative planning. A narrow rack that is tall rather than wide uses vertical space efficiently. A rack 18 inches wide and three tiers tall can hold six or more pairs of shoes while taking up very little floor space.
Angled designs are especially space-efficient. By tilting each shelf slightly, you can fit more tiers into a shorter overall height.
For extremely tight spaces, consider an under-bed rolling rack. Keep the height under six inches and add small casters to the bottom so it rolls in and out easily.
If floor space is truly at a premium, a door-mounted shoe organizer is an alternative worth considering, though it falls outside the scope of a woodworking build.
How to Build a Shoe Rack with a Bench Seat
Adding a bench seat to a shoe rack creates a dual-purpose piece of entryway furniture. The top platform needs to be thick enough to support sitting weight safely. A solid wood top at least 3/4 inch thick, ideally 1.5 inches for heavier use, is recommended.
Reinforce the top corners with internal corner brackets or additional blocking inside the frame. The recommended seat height for comfortable sitting is approximately 17 to 19 inches from the floor.
You can add a removable cushion or upholstered seat pad on top for comfort. This transforms the rack into a functional entryway bench. If you are interested in expanding this concept further, our full guide on how to build a simple storage bench covers reinforced bench construction in detail.
How to Finish a DIY Shoe Rack
The finish you apply protects the wood from shoe dirt, moisture, scuffs, and general daily wear.
Paint gives a clean, uniform look that hides wood grain and any minor surface imperfections. Apply a primer coat first for better adhesion and durability. Two coats of satin or semi-gloss paint hold up well on a shoe rack.
Stain enhances the natural grain of the wood. Apply stain evenly with a brush or cloth, allow it to penetrate, then wipe off the excess. Follow with a clear sealer for protection.
Polyurethane or lacquer adds a durable clear coat that resists moisture and scuffs. It works well over both bare wood and stained surfaces.
Wax gives a softer, more natural appearance but requires reapplication over time and offers less protection than polyurethane.
Leaving wood raw or unfinished is an option for a very rustic look, but it leaves the wood vulnerable to staining and moisture damage over time.
For a painted finish, our guide on how to paint a room: beginner’s guide includes practical brush and roller techniques that transfer well to furniture painting.
How to Make a Shoe Rack More Stable
A stable shoe rack starts with a square assembly. If the rack is even slightly out of square, it will rock on the floor and feel unstable.
Use both wood glue and screws at every joint. Glue alone is not enough, and screws alone can loosen over time. Together, they create a joint that is significantly stronger than either method alone.
Adding a thin back panel, even a 1/4-inch plywood sheet, dramatically increases rigidity by preventing the frame from racking side to side.
Corner brackets on the inside of the frame provide additional reinforcement for larger or heavier racks. Rubber feet on the base keep the rack from sliding and ensure all four corners contact the floor evenly.
Use screws long enough to penetrate well into the receiving piece. A general guideline is to choose a screw length that passes through the first piece and enters the second piece by at least one inch.
Common Shoe Rack Building Mistakes
Skipping the Planning Stage
Starting without a plan leads to mismatched dimensions, wasted lumber, and a rack that does not fit the intended space. Always sketch and measure first.
Not Checking for Square During Assembly
A rack built even slightly out of square will wobble permanently. Check every corner with a speed square before the glue sets.
Using Screws That Are Too Short
Short screws do not grip deeply enough into the receiving piece. The joint weakens over time, especially under the repeated stress of shoes being added and removed.
Skipping Pilot Holes
Driving screws into wood without pilot holes often splits the board, especially near the ends. Always pre-drill.
Rushing the Finish
Applying a second coat of paint or stain before the first coat is fully dry causes peeling, bubbling, and an uneven surface. Follow the product’s recommended dry time.
Choosing the Wrong Wood for the Location
MDF in a damp garage will swell and deteriorate. Raw pine in a mudroom will stain and absorb moisture. Match the material to the environment.
Making the Rack Too Tall or Too Deep for the Space
A rack that is too tall for a closet will not fit. One that is too deep for a narrow hallway becomes a tripping hazard. Measure the space first and build to those constraints.
Forgetting to Account for Shoe Size Variation
Building tier heights around the smallest shoes in the house means larger shoes will not fit comfortably. Always size the rack around the largest shoes present.
Not Sanding Before Finishing
Applying paint or stain to rough, unsanded wood produces a gritty, uneven finish. Sand thoroughly before applying any finish product.
Overloading the Rack Beyond Its Structural Capacity
A simple wooden rack has real structural limits. Piling far too many heavy shoes onto a small rack stresses the joints and can cause failure. Build the rack large enough for the load it needs to carry.
DIY Shoe Rack vs Store-Bought Shoe Rack
| Factor | DIY | Store-Bought |
|---|---|---|
| Cost | Lower; varies by material | Fixed; often $30–$200+ |
| Customization | Fully custom | Limited to available sizes |
| Materials | Your choice | Manufacturer’s choice |
| Assembly | Built from scratch | Usually flat-pack assembly |
| Time | Several hours to a full day | 30–60 minutes assembly |
| Durability | High with quality materials | Varies; often lower |
| Design Options | Unlimited | Limited to catalog options |
| Best For | Custom spaces, long-term use | Quick solutions, renters |
Estimated Cost to Build a Simple Shoe Rack
| Item | Estimated Cost | Notes |
|---|---|---|
| Lumber (pine or plywood) | $15–$50 | Varies by size and material |
| Wood Dowels (if applicable) | $5–$15 | For dowel-style builds only |
| Screws and Hardware | $4–$10 | Box of appropriate size screws |
| Wood Glue | $5–$12 | One bottle is typically sufficient |
| Sandpaper | $5–$10 | Multiple grits needed |
| Finish (paint, stain, sealer) | $10–$30 | Depends on product and coverage |
| Rubber Feet | $3–$8 | Four-pack is enough for most racks |
| Tools (if purchasing) | $50–$200+ | One-time investment for future projects |
| Estimated DIY Total | $47–$135 | Without tool purchase |
| Store-Bought Equivalent | $60–$200+ | For comparable size and quality |
Actual costs vary based on material choice, rack size, local lumber prices, and what tools you already own. Most homeowners find that building a shoe rack costs noticeably less than buying a comparable store-bought unit of similar quality.
How to Organize Your Shoe Rack Effectively
Once your rack is built and in place, a little organization goes a long way. Place the shoes you reach for most often on the top or most accessible tier. Less-used pairs go on lower or harder-to-reach tiers.
If multiple people share the rack, assign each person a tier or section. This prevents the rack from becoming a mixed pile again within a week.
Seasonal shoes that you only wear a few times a year do not need permanent rack space. Store them in boxes or bins elsewhere and rotate them in as needed.
Use small baskets on lower tiers for children’s shoes. Children tend to toss shoes rather than place them, and a bin corrals the mess without requiring precision.
Keep the rack from becoming overcrowded. A rack that is slightly under-full is easier to use and stays organized longer than one that is packed beyond capacity. For a broader entryway organization strategy, the guide on how to make a DIY entryway organizer pairs well with this project.
How to Maintain a DIY Shoe Rack
Wipe the shelves down regularly with a damp cloth to remove dirt and dust tracked in from shoes. Allow the rack to dry fully before replacing shoes to prevent moisture buildup.
Check the joints and screws every few months. Screws can loosen slightly over time, especially in a rack that sees heavy daily use. Re-tighten any loose fasteners promptly before they cause structural problems.
Touch up the finish when you notice scratches, chips, or worn areas. A small amount of matching paint or stain applied with a brush keeps the rack looking fresh and continues protecting the wood.
Keep the rack away from areas with standing water or persistent humidity. If the rack lives in a mudroom or garage, ensure the area has reasonable ventilation.
Staying on top of small maintenance tasks is much easier than dealing with a rack that has been neglected for years. Building this habit applies across your entire home, and a home maintenance checklist by month can help you stay organized year-round.
Shoe Rack Safety Tips
Always wear safety glasses when cutting, drilling, or sanding. Wood chips, sawdust, and small debris move fast and can cause serious eye injury. Wear hearing protection when using power saws or a drill for extended periods.
According to the Occupational Safety and Health Administration (OSHA), proper personal protective equipment is essential whenever power tools are in use. This applies equally to DIY home workshops as it does to professional job sites.
Set up your workspace on a flat, stable surface. Keep cords out of your walking path. Store sharp tools safely when you are not actively using them.
Keep children and pets out of the work area during cutting and drilling. Sawdust and small hardware pieces are both tripping and choking hazards.
Always follow the safety instructions provided by your tool manufacturer. Different tools have specific safety requirements that are important to understand before use.
After the rack is in use, make sure it sits flat and does not rock. An unstable rack can tip if a heavy load shifts suddenly.
When to Buy Instead of Build
Building a shoe rack is a great project for most homeowners, but buying ready-made is sometimes the more practical choice.
If you need a storage solution today and do not have the time to plan and build, a store-bought rack makes sense. If you are in a temporary living situation or renting a home where you do not plan to stay long, a simple store-bought unit serves the purpose without requiring tools or a workspace.
If the design you have in mind is significantly more complex than your current skill level allows, starting with a simpler build and working up to the complex one is wiser than struggling through a project that results in frustration.
There is no shame in buying when buying is the right decision. This guide is here when you are ready to build.
Expert Tips for a Better DIY Shoe Rack
Pre-finish individual boards before assembly whenever possible. Painting or staining flat pieces before the rack is assembled is much easier than trying to reach into tight corners afterward.
Use clamps generously during glue-up. The more contact pressure you apply while the glue cures, the stronger the joint will be. You can never have too many clamps on a glue joint.
Check for square at every stage of assembly, not just at the end. Catching a misalignment at the first shelf is easy. Catching it after all shelves are attached is a serious problem.
Choose screw length based on material thickness. As a practical rule, the screw should pass completely through the first piece and penetrate at least one inch into the second piece.
Let the finish cure fully before loading the rack. A finish that is dry to the touch is not the same as a finish that is fully hardened. Loading too early can cause the finish to stick, peel, or dent.
Plan the rack around the largest shoe size in the household. Tier depth and height that comfortably fits a size 13 men’s boot will comfortably fit every smaller size as well.
Add an extra tier rather than increasing tier height. Taller tiers waste vertical space and make the rack harder to use efficiently. One additional shorter tier holds more shoes in the same overall height.
Cut all identical pieces consecutively. After the first piece is cut to length, use it as a template to mark and cut the remaining identical pieces. This keeps them consistent and saves measuring time.
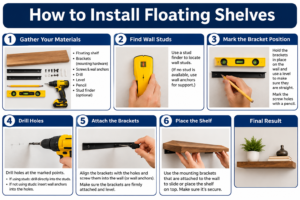
If you are installing any wall-mounted elements alongside your shoe rack, our guide on how to install floating shelves covers wall mounting techniques that complement an entryway storage setup nicely.
Frequently Asked Questions
What type of wood works best for a first-time shoe rack build?
Pine is the most practical choice for a beginner building their first shoe rack. It is affordable, available at every home improvement store, easy to cut, easy to sand, and finishes well with paint or stain. Pine is soft enough that standard drill bits and saw blades handle it without difficulty. The one limitation is that pine dents more easily than hardwoods, so it is not the best choice for a very high-traffic location with heavy boots. For most entryway and closet shoe racks, pine provides more than enough strength and durability for daily household use.
How wide does a shoe rack need to be to hold a decent number of pairs?
A rack between 30 and 36 inches wide comfortably holds three to four pairs of adult shoes per tier. If you want to hold more pairs per tier, a rack up to 48 inches wide is reasonable, though wider racks may need a center support to prevent shelf sagging. For a children’s rack, 24 to 30 inches is typically sufficient. The key is to balance the width you need against the wall space available. Measuring the intended location before settling on a width prevents the common mistake of building a rack that does not fit where you planned.
Can I build a shoe rack using only wood glue without any screws?
Technically, wood glue alone creates a very strong bond, but a glue-only build is not practical for most beginners because it requires very precise joinery and sustained clamping pressure during a full cure period. The slightest movement while the glue sets will weaken the joint. For a beginner-friendly build, using both wood glue and screws together is far more reliable. The screws hold everything in position while the glue cures, and the cured glue adds long-term strength to the joint. The combination is stronger and easier to execute than either method used alone.
How do I stop a finished shoe rack from wobbling on an uneven floor?
Wobbling almost always comes from one of two causes. Either the rack was assembled slightly out of square, or the floor itself is uneven. If the rack is square but still rocks, adjustable rubber feet can solve the problem. These feet thread in or out to compensate for floor unevenness. If the rack itself is out of square, the fix requires loosening the joints and reassembling with careful attention to the corner angles. Adding a thin back panel also significantly reduces racking movement, which is the side-to-side flexing that makes a rack feel loose and unstable.
How long does it realistically take to build a simple shoe rack?
A simple three-tier flat-shelf shoe rack built by a beginner using power tools typically takes four to six hours from start to finish, including measuring, cutting, sanding, assembly, and a basic finish application. With hand tools, expect to add two to three more hours. This does not include the 24-hour glue cure time or the finish drying time, which can add another one to two days before the rack is ready for use. Spreading the build over a weekend works well. Day one for cutting and assembly. Day two for finishing and final touches.
Can I build a shoe rack from plywood instead of solid boards?
Plywood is an excellent choice for a shoe rack. It is very stable, resists warping better than many solid woods, and is available in large sheets that can be cut to any dimension you need. The main consideration with plywood is the edges. Plywood edges show the internal layers of the material, which is not attractive on a finished rack. You can cover the edges with iron-on wood edge banding, fill them with wood filler before painting, or cover them with a thin strip of solid wood. Plywood of 3/4-inch thickness is strong enough for most shoe rack shelving applications.
How do I waterproof a shoe rack that will be used in a garage?
For a garage environment, start with a moisture-resistant material such as cedar or sealed plywood rather than pine or MDF. Apply two coats of exterior-grade polyurethane or a dedicated wood sealer to all surfaces, including the underside and back. Allow full curing time between coats. Place rubber feet under the rack to lift it off the concrete floor, which is often damp. Avoid placing the rack directly against an exterior wall where condensation may collect. Even with a good sealer, periodic reapplication every year or two keeps the protection effective in a high-humidity environment.
How many tiers does a practical shoe rack need for a family of four?
A family of four with a typical shoe collection generally benefits from four to six tiers, depending on how many pairs each person keeps near the door. A four-tier rack at 30 to 36 inches wide holds approximately 12 to 16 pairs, which is a reasonable starting point. If the household includes children who go through shoes frequently or adults with active lifestyles and multiple footwear types, adding an extra tier during the build is easier than rebuilding the rack later. Plan around the full collection the rack needs to hold, not just the minimum number you want to store.
Is this a realistic project for someone with no woodworking experience at all?
A flat-shelf or dowel-style shoe rack is genuinely one of the best first woodworking projects for a complete beginner. The cuts are all straight. The joinery is simple screws and glue. The design does not require advanced techniques like dovetails, mortises, or complex joinery. If you can measure carefully, cut along a straight line, and drive a screw, you have the skills to complete this project. Take your time with each step, check your work frequently, and do not rush the finish. The result will be a functional, good-looking piece of furniture that you built entirely from scratch.
How do I deal with shoe odor on a wooden shoe rack?
Wood naturally absorbs odors over time, especially in an enclosed space. Cedar is the best material choice for naturally resisting and masking shoe odors because of its aromatic oils. For an existing rack made from other woods, placing small cedar blocks or cedar sachets on or near the rack helps absorb odors. Allowing adequate airflow around the rack reduces odor buildup. Wipe down the shelves periodically with a solution of white vinegar and water, which neutralizes odors effectively. Avoid sealing shoes in an enclosed cabinet without ventilation, as that accelerates odor concentration significantly compared to an open rack design.
Conclusion
Building a simple shoe rack is one of the most practical and rewarding beginner woodworking projects you can take on. It solves a real problem in your home, costs less than most store-bought alternatives, and results in a piece that is sized and styled exactly for your space.
The process comes down to a few key principles. Plan the design and dimensions carefully before you cut anything. Choose the right material for the location where the rack will live. Cut accurately, sand thoroughly, and assemble square. Apply a finish that protects the wood from the daily wear shoes bring with them. Maintain the rack periodically so it stays solid and looking good for years.
Start with a simple flat-shelf or dowel design. Get comfortable with the tools and the process. As your confidence grows, you can take on more complex builds with bench seats, integrated storage, or modular stacking systems.
Every project you complete builds skill and confidence for the next one. A simple shoe rack is an excellent place to start.