How to Build a Simple Planter Box: A Complete Beginner’s Guide

Introduction
Growing your own herbs, flowers, or vegetables does not require a large yard or perfect soil. A simple wooden planter box gives you a dedicated growing space almost anywhere, and building one yourself is one of the most satisfying beginner DIY projects you can tackle on a weekend.
Planter boxes solve real problems. Many homeowners deal with limited ground space, compacted native soil, or drainage issues that make in-ground gardening difficult. A planter box puts you in complete control. You choose the soil, the depth, the drainage, and the location.
You can place a planter box on a front porch, back deck, balcony, raised garden bed area, driveway edge, windowsill, or even indoors near a bright window. The design adapts to almost any space and any style of home.
Building your own means you control every detail. The size fits your exact space. The wood matches your outdoor furniture. The finish holds up to your local climate. And the drainage is built right from the beginning, not added as an afterthought.
This guide walks you through the entire process from planning to planting, with practical steps any beginner can follow.
What Is a Simple Planter Box?
A simple planter box is a freestanding wooden structure designed to hold soil and plants above ground level. It is an open-top box, usually rectangular, that sits on a surface rather than being built into a wall or permanent structure.
A planter box is different from a raised garden bed, which is typically larger, sits directly on the ground, and is not meant to be moved. It is also different from a ceramic or plastic container pot, which is molded rather than constructed. A built-in planter is attached permanently to a deck or structure. A simple planter box is none of those things. It stands on its own, can be moved if needed, and is built from straightforward components.
The basic structural parts include:
- Side panels that form the long walls of the box
- End panels that close the short ends
- A bottom panel or base boards with drainage gaps or holes
- Corner joints or corner posts that hold everything together
- An optional liner to protect the wood from moisture and soil
- Optional feet or legs to elevate the box off the ground
Why Build Your Own Planter Box?
The cost difference between a DIY planter box and a comparable store-bought version is significant. A well-built cedar planter box that would retail for $80 to $150 can often be built at home for $30 to $60 in materials.
Beyond cost, the customization is unmatched. You decide the exact length, width, and depth to fit a specific spot on your deck or porch. No store-bought planter comes in precisely the dimensions your space requires.
You also control the drainage design, which directly affects how well your plants grow. Many store-bought planters have inadequate or no drainage. When you build your own, you build drainage in from the start.
There is also real satisfaction in this kind of project. A planter box you built yourself, filled with herbs you grew, placed on a porch you enjoy every morning, is a deeply rewarding combination of practical skill and everyday pleasure.
Where Can You Use a Planter Box?
Front Porch
A planter box on a front porch creates an immediate visual impact. Choose a size proportional to your porch width. Consider the weight once filled with soil and plants, and use pot feet to prevent moisture damage to the porch floor.
Back Deck or Patio
A deck or patio planter works well for herbs, flowers, and vegetables within easy reach of the kitchen. Protect the deck surface with rubber feet or pot feet. Ensure drainage water can flow freely without pooling on the deck boards.
Balcony
Balcony planters need to be planned carefully with weight in mind. Moist soil is heavy. Keep the planter size modest on an upper-floor balcony and confirm that your balcony can safely handle the additional load before placing a large filled planter.
Raised Garden Bed Area
A planter box used as a raised bed can be placed directly on soil or gravel in the garden area. This style benefits from a slightly larger footprint and deeper sides for vegetable growing.
Driveway Edge or Pathway
Planter boxes along a driveway edge or garden pathway add structure and color. These locations often get good sun exposure but may need more frequent watering in dry weather. Choose a durable finish for this exposed position.
Windowsill or Indoor Use
A shallow window box planter works inside on a sunny windowsill for herbs or succulents. Use a liner to catch drainage water and protect the windowsill surface. Keep indoor planters lightweight and sized for the available sill depth.
How to Plan Your Planter Box
Good planning before you buy a single board saves time, money, and frustration. Start by deciding what you want to grow. The plants you choose determine the minimum soil depth the planter needs, which in turn determines how tall the box must be.
Think about the available space and measure it carefully. Account for sun exposure at that location throughout the day. Decide whether the planter will stay put permanently or be moved seasonally.
Consider how many planters you want. Building two identical boxes at the same time is almost as fast as building one and gives you more planting space for a modest extra investment.
Choose your preferred style, material, and finish before you purchase lumber. Setting a realistic budget upfront helps you make material choices without overspending. A sketch with labeled dimensions on paper is all you need before moving to the lumber yard.
Planter Box Styles and Designs
Simple Rectangular Planter Box
The rectangular box is the most practical and beginner-friendly design. It suits almost any location and plant type. It is the best starting point for anyone building their first planter.
Square Planter Box
A square planter works well as a standalone statement piece on a porch or patio. It is compact and symmetrical, which suits formal garden styles. The build process is nearly identical to a rectangular box.
Tall Planter Box or Planter Tower
A tall planter brings greenery up to eye level and works well for flowers or ornamental grasses. The taller the box, the more important it is to reinforce the corner joints and use thicker lumber for the sides.
Window Box Planter
A window box is a narrow, shallow planter mounted below a window on brackets. It is excellent for herbs, trailing flowers, and seasonal color. Weight management is critical for a mounted window box.
Tiered Planter Box
A tiered design stacks two or more planting levels in a staircase arrangement. It is visually interesting and space-efficient. The build is moderately more complex than a flat single-tier box.
Planter Box with Trellis
Adding a trellis to a planter box creates a vertical growing structure for climbing plants like beans, cucumbers, or flowering vines. The trellis requires secure attachment to the planter frame to handle wind and plant weight.
| Style | Difficulty | Best For | Space Efficiency | Estimated Cost | Appearance |
|---|---|---|---|---|---|
| Rectangular | Beginner | All plants, all locations | Moderate | $25–$70 | Classic, versatile |
| Square | Beginner | Porch, patio focal point | Moderate | $20–$60 | Symmetrical, formal |
| Tall/Tower | Intermediate | Flowers, ornamentals | High | $40–$100 | Dramatic, vertical |
| Window Box | Beginner–Intermediate | Herbs, trailing flowers | Very High | $20–$60 | Charming, traditional |
| Tiered | Intermediate | Small gardens, display | High | $50–$120 | Layered, decorative |
| With Trellis | Intermediate | Climbing plants, vines | Very High | $60–$150 | Structural, lush |
Choosing the Right Wood and Materials
The material you choose matters more for a planter box than for most indoor woodworking projects. Outdoor exposure, moisture from soil, and freeze-thaw cycles all test the wood constantly.
Cedar is one of the most popular choices for outdoor planters. It contains natural oils that resist rot and repel insects without chemical treatment. It is lightweight, easy to work with, and weathers gracefully to a silver-gray if left unsealed.
Redwood offers similar natural rot resistance and a beautiful appearance. It costs more than cedar and is less widely available outside the western United States, but it is an excellent premium option.
Pine is affordable and available everywhere. It requires thorough sealing for outdoor use because it has no natural rot resistance. Sealed pine can last several seasons, but it needs more maintenance than cedar or redwood.
Modern pressure-treated lumber uses copper-based preservatives that are considered safer than older arsenic-based treatments that were phased out in the early 2000s. The U.S. Environmental Protection Agency (EPA) provides guidance on current wood preservative treatments and their approved uses. For edible plant planters, research the specific treatment type and follow manufacturer guidance carefully before using pressure-treated lumber.
Exterior-grade plywood is a valid option for planter boxes when finished and lined properly. Use at least 3/4-inch thickness for structural integrity. The edges need sealing or banding to prevent delamination from moisture.
Douglas Fir is stronger than pine and moderately rot-resistant. It is a good middle-ground option where cedar is not readily available.
Composite lumber resists rot, insects, and moisture without any treatment. It is heavier than wood and more expensive, but it requires essentially no maintenance.
| Material | Rot Resistance | Best Use | Workability | Est. Cost | Finish Needed |
|---|---|---|---|---|---|
| Cedar | High | All outdoor planters | Very Easy | $4–$8/bd ft | Optional; extends life |
| Redwood | High | Premium outdoor planters | Easy | $6–$12/bd ft | Optional; extends life |
| Pine | Low | Sealed indoor/outdoor | Very Easy | $2–$4/bd ft | Required for outdoor |
| Pressure-Treated | Very High | Ground contact, longevity | Easy | $3–$6/bd ft | Optional; verify food safety |
| Exterior Plywood | Moderate | Large flat panels | Easy | $40–$90/sheet | Required |
| Douglas Fir | Moderate | Structural builds | Easy | $3–$5/bd ft | Recommended |
| Composite | Very High | Low-maintenance builds | Moderate | $5–$12/bd ft | Not required |
For edible plants, material safety is not optional. Research the specific product thoroughly and follow manufacturer safety information before using any treated or composite material in a vegetable or herb planter.
Tools and Materials You Need
| Tool or Material | Purpose | Recommended Use | Est. Cost |
|---|---|---|---|
| Lumber | Main structure | All builds | Varies |
| Exterior-Grade Screws | Joins pieces, resists rust | All outdoor builds | $5–$12 |
| Exterior Wood Glue | Strengthens joints | All builds | $6–$14 |
| Sandpaper (80, 120, 220 grit) | Smooths surfaces | All builds | $5–$15 |
| Tape Measure | Accurate measurement | All builds | $5–$20 |
| Pencil | Marks cut lines | All builds | Under $2 |
| Speed Square | Checks 90-degree angles | All builds | $7–$20 |
| Circular Saw or Miter Saw | Cuts lumber to length | All builds | $50–$300 |
| Drill | Drives screws, bores holes | All builds | $30–$150 |
| Drill Bits | Creates pilot and clearance holes | All builds | $5–$30 |
| Countersink Bit | Recesses screw heads flush | All builds | $5–$15 |
| Clamps | Holds pieces during assembly | All builds | $10–$40 |
| Level | Ensures planter sits flat | All builds | $5–$25 |
| Safety Glasses | Eye protection | All builds | $5–$15 |
| Hearing Protection | Protects hearing from power tools | Power tool use | $5–$20 |
| Exterior Finish or Sealant | Protects wood from weather | All outdoor builds | $10–$35 |
| Landscape Fabric or Liner | Retains soil, protects wood | All builds | $5–$20 |
| Drainage Gravel | Improves drainage above liner | Optional | $5–$15 |
| Rubber Feet or Pot Feet | Lifts planter, protects surface | All builds | $3–$10 |
Always use exterior-grade screws for any outdoor planter box. Standard interior screws corrode quickly when exposed to moisture, and rust stains bleed through the finish in a matter of months. Stainless steel or hot-dipped galvanized screws hold up far better over time.
Planter Box Dimensions Guide
| Planter Type | Length | Width | Depth | Min. Soil Depth | Best Plant Types |
|---|---|---|---|---|---|
| Herb Box | 24–36 in | 8–12 in | 6–8 in | 6 in | Herbs, lettuce, chives |
| Flower Box | 24–48 in | 10–14 in | 8–10 in | 8 in | Annuals, trailing flowers |
| Vegetable Box | 36–48 in | 14–18 in | 12–16 in | 12 in | Tomatoes, peppers, beans |
| Raised Bed Box | 48–72 in | 18–24 in | 16–24 in | 16 in | Mixed vegetables, perennials |
| Window Box | 24–48 in | 6–10 in | 6–8 in | 6 in | Herbs, trailing annuals |
| Shrub Planter | 24–36 in | 18–24 in | 18–24 in | 18 in | Dwarf shrubs, ornamental grasses |
Soil depth requirements vary considerably. Shallow-rooted herbs like basil and parsley thrive in 6 inches of soil. Tomatoes and peppers need at least 12 inches, and ideally more. Dwarf shrubs and perennials may need 18 inches or deeper to establish healthy root systems.
Deeper planters hold more weight and put more stress on the joints. When building a deeper box, use thicker lumber for the sides and reinforce the corner connections with additional screws or corner posts.
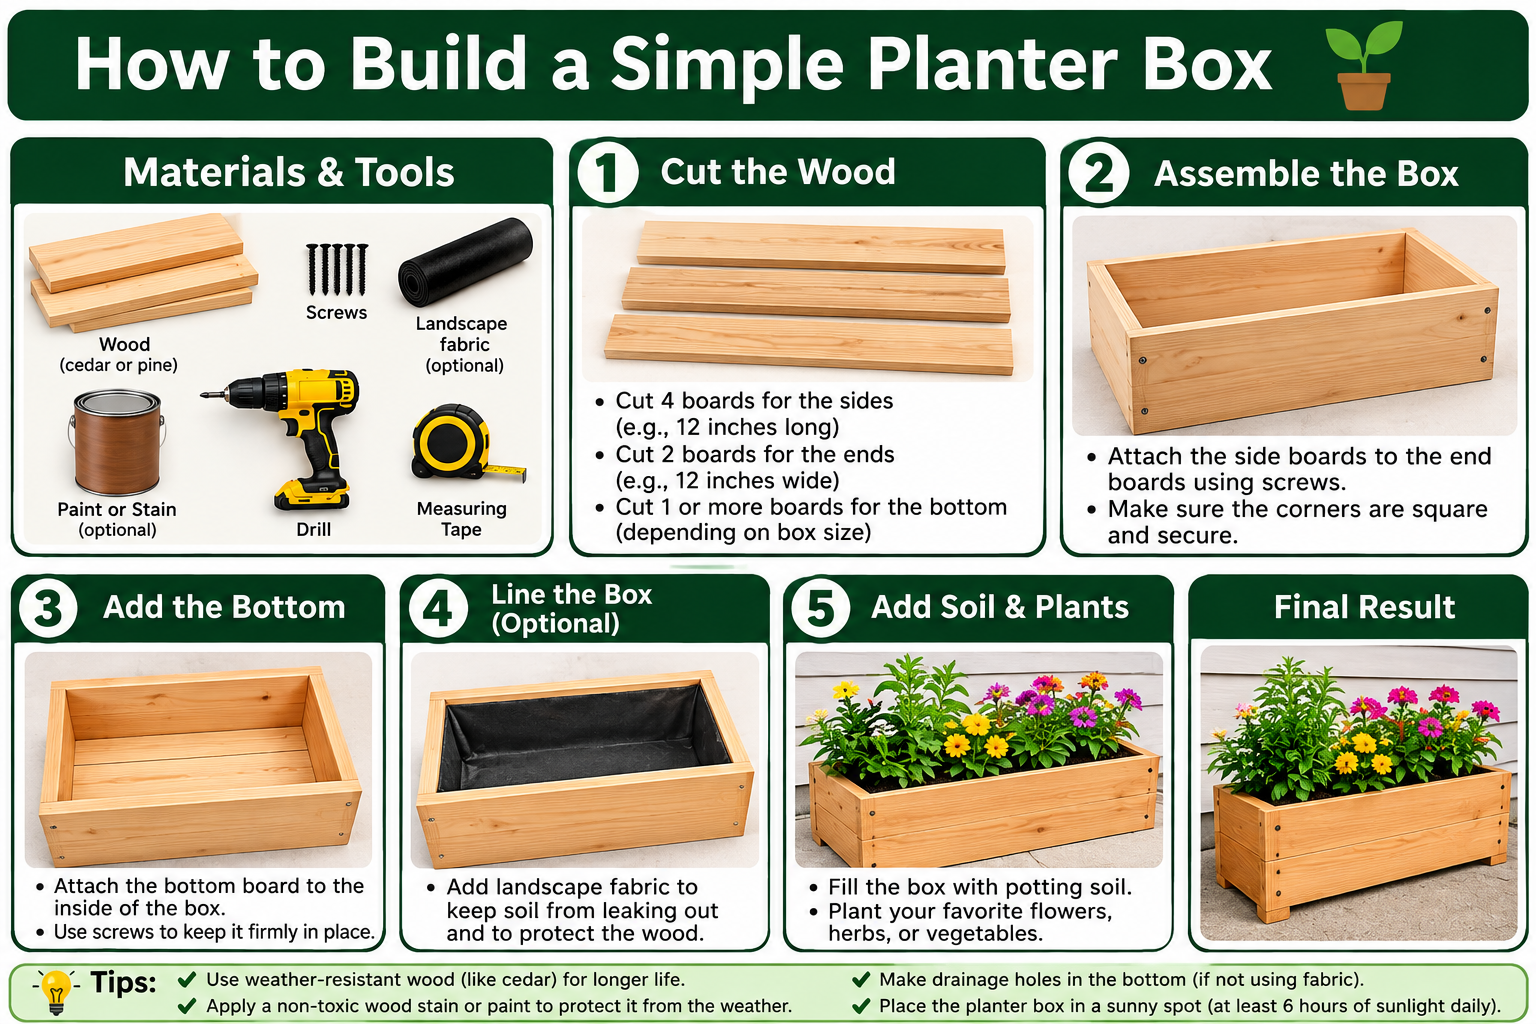
How to Build a Simple Planter Box Step by Step
Step 1: Plan Your Design and Dimensions
Start with a clear sketch on paper. Write down the finished outside dimensions including length, width, and height. Account for the lumber thickness in your calculations. A box made from 3/4-inch boards that appears 12 inches wide on the outside actually has an interior width of 10.5 inches.
Step 2: Create a Cut List
Write down every piece of wood you need with its exact dimensions. A simple rectangular box requires two long side panels, two shorter end panels, and several bottom boards. A cut list prevents overbuying and ensures every cut is planned before you start.
Step 3: Purchase Your Materials
Take your cut list to the lumber yard or home improvement store. Check each board for straightness, warping, and large knots before loading it. Buy one or two extra boards as a buffer for cutting errors.
Step 4: Set Up Your Workspace Safely
Clear your work area and set up on a stable, flat surface. Lay out your tools within easy reach. Ensure good lighting and ventilation, especially if you will be applying finish later. Reviewing safe tool habits is worth the few minutes it takes. A solid reference is the guide to home maintenance tools every homeowner needs, which covers safe storage and use of common workshop tools.
Step 5: Measure and Mark the Lumber
Use a tape measure and pencil to mark every cut line clearly. Double-check each measurement before marking. Use a speed square to draw a straight line across the board at the cut mark.
Step 6: Cut the Side and End Panels
Cut both long side panels to the same length. Then cut both end panels. Use the first cut piece as a length reference for the matching piece to keep dimensions consistent. Wear safety glasses throughout all cutting.
Step 7: Cut the Bottom Boards or Base Panel
Cut the bottom boards to the appropriate length. If you are using individual boards for the bottom rather than a single sheet, leave small gaps between them during assembly for natural drainage.
Step 8: Sand All Pieces Before Assembly
Sand every piece using 80-grit sandpaper first, followed by 120-grit. Pre-sanding flat boards before assembly is much easier than sanding around assembled corners. Finish with 220-grit for a smooth surface before applying any finish.
Step 9: Pre-Drill Pilot Holes
Mark and drill pilot holes at every screw location before assembly. Use a countersink bit to recess the screw head flush with or slightly below the wood surface. Pilot holes prevent splitting, especially near the ends of boards.
Step 10: Assemble the End Panels to the Side Panels
Apply exterior wood glue to the contact surfaces, then position the end panel against the side panel. Clamp the joint, check the alignment, and drive the screws. Repeat for all four corners.
Step 11: Check for Square
After the frame is assembled, use a speed square to check each corner. Measure diagonally from corner to corner in both directions. Equal diagonal measurements confirm the box is square. Correct any misalignment before the glue sets.
Step 12: Attach the Bottom Boards with Drainage Gaps
Lay the bottom boards across the base of the frame, leaving small gaps of approximately 1/4 to 1/2 inch between each board. These gaps allow water to drain freely. Apply glue and screws to secure each board to the frame.
Step 13: Drill Additional Drainage Holes if Needed
If you used a solid panel for the bottom, drill evenly spaced drainage holes using a 1/2-inch or larger drill bit. Space the holes approximately 4 to 6 inches apart across the bottom surface.
Step 14: Check the Overall Structure for Stability
Place the assembled box on a flat surface and check that it sits without rocking. Apply gentle pressure from different angles to feel for any looseness in the joints. Address any movement before moving on.
Step 15: Fill Any Screw Holes if Desired
If you plan to paint the planter, fill screw holes with exterior wood filler. Allow it to dry fully and sand smooth. For a natural stained finish, consider using wooden plugs that match the wood species.
Step 16: Sand the Assembled Planter Box
Sand the entire assembled box with 120-grit sandpaper followed by 220-grit. Pay special attention to corners and edges. Smooth, well-sanded wood accepts finish more evenly and looks significantly more professional.
Step 17: Apply Your Chosen Exterior Finish
Apply exterior sealant, stain, or paint according to the product instructions. Work in a well-ventilated area. Apply thin, even coats and allow full drying time between each coat. Two coats provide better protection than one heavy coat.
Step 18: Install a Landscape Fabric Liner
Cut landscape fabric to fit the interior of the box. Staple it along the top edges of the interior walls, covering all four sides and the bottom. The fabric retains soil while allowing water to drain through. This also protects the wood from direct soil contact, which significantly extends its life.
Step 19: Add Optional Feet or Pot Feet
Attach rubber feet or decorative pot feet to the four corners of the planter base. Lifting the planter even a small amount off the ground or deck surface improves drainage flow and prevents moisture from pooling directly beneath the box.
Step 20: Allow the Finish to Cure Before Planting
Even if the finish feels dry to the touch, it may not be fully cured. Allow the recommended cure time from the product label, typically 24 to 72 hours, before adding soil and plants.
How to Add Proper Drainage to a Planter Box
Drainage is not optional in a planter box. Plant roots sitting in waterlogged soil deteriorate quickly. Root rot is one of the most common and preventable causes of container plant failure.
The simplest drainage method is to leave gaps between the bottom boards during assembly. Water flows freely through these gaps without any additional drilling. This approach also gives the planter a natural, crafted look from below.
If you use a solid bottom panel, drill evenly spaced 1/2-inch holes across the surface. Cluster a few holes near the center and the corners where water naturally collects.
Install landscape fabric over the drainage gaps or holes before adding soil. The fabric stops soil from washing out while allowing water to pass through freely.
A thin layer of coarse gravel directly above the landscape fabric improves drainage further by preventing the fabric from being pushed into the gaps under the weight of wet soil.
Elevating the planter on rubber feet ensures the drainage openings are never blocked by surface contact. Even an inch of clearance makes a meaningful difference in how quickly the planter drains after watering.
How to Line a Planter Box
A liner protects the interior wood surfaces from direct contact with moist soil, which is the primary cause of premature rot in wooden planters.
Landscape fabric is the most common and practical liner. It is breathable, allows drainage, and is inexpensive. Staple it securely to the interior walls so it does not shift when you add soil.
Heavy-duty black plastic sheeting creates a more complete moisture barrier. It keeps the wood drier but requires sufficient drainage holes to avoid trapping water inside the box. Cut slits or punch holes through the plastic at the drainage locations.
A pond liner provides the most complete moisture protection and is worth using in a planter built from pine or another wood that requires extra protection. It is more expensive but significantly extends the wood’s life in wet climates.
A liner is optional for naturally rot-resistant woods like cedar or redwood. It is strongly recommended for pine, plywood, or any untreated wood used in a location that receives regular watering or rain.
How to Waterproof and Seal a Planter Box
Sealing is the most important maintenance step for any outdoor wooden planter that is not made from naturally rot-resistant wood.
Exterior wood sealants penetrate the wood surface and repel moisture. They are clear or lightly tinted and preserve the natural wood appearance. Reapply annually for best protection in most climates.
Linseed oil and tung oil are natural penetrating oils that protect wood from within. They are safer for use near edible plants than many synthetic sealants. However, they offer less protection than modern exterior finishes and need more frequent reapplication.
Exterior paint provides the most complete surface barrier and comes in unlimited color options. Two coats of exterior satin or semi-gloss paint over a primed surface hold up very well on a planter box exterior.
Stain and sealer combinations offer color plus protection in a single product. They work well on cedar and pine and are easy to reapply when the finish begins to look worn.
If you are growing edible plants, verify that any sealant or finish product is safe for use around food before applying it to the interior surfaces. Some products are clearly labeled for this purpose. When in doubt, apply finish only to the exterior and rely on a liner for interior protection.
How to Build a Raised Planter Box on Legs
An elevated planter box benefits gardeners in several important ways. It improves drainage by keeping the base well above the ground. It reduces bending and kneeling, which matters for anyone with back or knee discomfort. And it adds a furniture-like presence to a deck or patio.
Adding legs to a basic planter box is straightforward. Attach 4×4 corner posts to each corner of the box before assembling the sides. The posts extend below the box base to form the legs.
For standing access, leg height of approximately 24 to 36 inches puts the planting surface at a comfortable working height. For seated access, approximately 18 to 20 inches works better for most people.
Reinforce the leg connections with exterior corner brackets or carriage bolts rather than screws alone. The legs bear the entire weight of the filled planter, which can be substantial once soil and plants are in place.
Choose the same rot-resistant material for the legs as the rest of the box. Legs make direct contact with the ground or deck surface and need to be at least as durable as the box itself.
How to Build a Window Box Planter
A window box planter adds color and charm to any exterior window. Keep the box width close to the window width for a proportional, intentional look. Standard window boxes range from 24 to 48 inches long.
Use exterior-grade materials throughout. The window box faces constant weather exposure with no protection from roof overhang in many installations.
Keep the box depth and width modest for a wall-mounted installation. A deep, wide window box filled with moist soil is very heavy. Every pound matters when the box hangs from wall-mounted brackets.
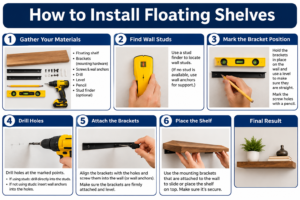
Install heavy-duty mounting brackets rated well above the expected weight of the filled box. The principles of secure wall-mounted bracket installation are similar to those covered in our guide on how to install floating shelves, including using appropriate hardware for the wall type and always verifying the bracket is level before fastening.
Ensure drainage holes are drilled before mounting. Once the box is on the wall, reaching underneath to add drainage is awkward and risks damaging the finish.
How to Build a Planter Box with a Trellis
A trellis attached to a planter box creates a complete vertical growing system. Attach two vertical posts, typically 1×2 or 2×2 lumber, to the back corners of the planter box frame. Extend the posts as high as the climbing plant requires, typically 4 to 6 feet for most vegetables and annual climbers.
Connect the posts at the top with a horizontal crossbar. Then add horizontal or diagonal supports between the posts using wood slats, wire, or garden twine. Space the supports 6 to 8 inches apart for most climbing plants to grab hold of comfortably.
Reinforce the trellis post connections at the planter frame with carriage bolts rather than screws alone. The trellis will experience wind loads and the pulling weight of mature climbing plants, both of which stress the connection points.
Good climbing plants for a planter trellis include pole beans, cucumbers, sweet peas, nasturtiums, and smaller varieties of squash. Match the trellis height to the mature height of your chosen plant.
Planter Box Wood Treatment and Longevity
Understanding how long different woods last helps you choose the right material for your situation. Untreated pine left outdoors without sealing typically deteriorates noticeably within one to two seasons in wet climates. Sealed pine can last four to six seasons with proper maintenance.
Cedar and redwood left unsealed weather to a natural silver-gray and can last ten or more years in most climates without significant structural deterioration. Sealed cedar or redwood lasts even longer.
Pressure-treated lumber can last twenty years or more in outdoor applications. The tradeoff is the treatment chemicals, which require research before use near food crops.
A well-installed liner reduces wood deterioration regardless of the species used by keeping the wood drier on the inside. This is especially important in rainy climates where the soil stays wet for extended periods.
Watch for these signs of deterioration: soft or spongy wood when pressed with a finger, dark discoloration at joints, visible splitting or cracking of the wood surface, and screws that no longer hold firmly. Early signs caught quickly can often be addressed by replacing individual boards rather than the entire planter.
Common Planter Box Building Mistakes
Skipping the Drainage Design
A planter box with no drainage fills with standing water every time it rains. Waterlogged soil suffocates plant roots. Always build drainage into the base before assembly.
Using Interior-Grade Screws or Glue Outdoors
Standard interior screws rust quickly in outdoor conditions. Rust stains bleed through the finish and weaken the joint from within. Always use exterior-grade or stainless steel screws and exterior-rated wood glue.
Choosing the Wrong Wood for Outdoor Use
MDF dissolves in outdoor conditions. Untreated pine deteriorates rapidly in wet climates. Match the wood species and treatment to the environment where the planter will live.
Making the Planter Too Heavy to Move
A large planter filled with moist soil is extremely heavy. If you intend to move the planter seasonally, keep the dimensions modest and consider a liner rather than a thick solid bottom to reduce overall weight.
Skipping Pilot Holes
Driving screws into wood without pilot holes, especially near the board ends, frequently causes splitting. Pre-drill every screw location before assembly.
Not Checking for Square
A box assembled out of square will sit crooked and look uneven. Check with a speed square and by measuring corner-to-corner diagonals before the glue sets.
Overbuilding the Height Without Reinforcement
A very tall planter box with thin sides will flex and bow outward under the pressure of moist soil. Use thicker lumber or add interior cross-supports for boxes taller than 12 inches.
Forgetting to Line the Interior
Skipping the liner means soil contacts raw wood constantly. This accelerates rot dramatically, especially in pine and other non-resistant species. Always line the interior when building for longevity.
Rushing the Finish
Applying a second coat of sealant or paint before the first coat dries leads to peeling and bubbling. Follow the product label and allow full drying time between coats.
Placing the Planter Without Considering Sun and Drainage
A beautiful planter placed in a shady corner that gets no drainage clearance will struggle to grow healthy plants. Consider sun exposure and drainage flow before committing to a permanent location.
DIY Planter Box vs Store-Bought Planter
| Factor | DIY | Store-Bought |
|---|---|---|
| Cost | Lower; varies by material | Fixed; often $50–$200+ |
| Customization | Fully custom dimensions | Limited to available sizes |
| Materials | Your choice | Manufacturer’s choice |
| Assembly | Built from scratch | Typically ready to use |
| Time | Several hours to a full day | Immediate |
| Durability | High with quality materials | Varies; often lower |
| Design Options | Unlimited | Limited to catalog options |
| Best For | Custom spaces, long-term use | Quick solutions, renters |
Estimated Cost to Build a Simple Planter Box
| Item | Estimated Cost | Notes |
|---|---|---|
| Lumber (cedar or pine) | $20–$60 | Varies by species and size |
| Exterior Screws and Hardware | $5–$12 | Stainless or galvanized |
| Exterior Wood Glue | $6–$14 | One bottle typically sufficient |
| Sandpaper | $5–$10 | Multiple grits needed |
| Exterior Finish or Sealant | $10–$30 | Varies by product type |
| Landscape Fabric Liner | $5–$15 | Cut from a roll |
| Drainage Gravel | $4–$10 | Optional but helpful |
| Pot Feet or Rubber Feet | $3–$8 | Four-piece set |
| Tools (if purchasing) | $50–$200+ | One-time investment |
| Estimated DIY Total | $58–$159 | Without tool purchase |
| Store-Bought Equivalent | $80–$250+ | Comparable quality and size |
Actual costs vary based on wood species, planter dimensions, local lumber prices, and tools already owned. Cedar costs more than pine upfront but typically requires less maintenance spending over its lifespan.
What to Plant in a Planter Box
The right plant for a planter box depends on soil depth, sun exposure, and your local climate. Matching the plant to the planter makes a significant difference in how well everything grows.
Shallow planters of 6 to 8 inches suit herbs like basil, parsley, mint, thyme, and chives beautifully. Lettuce and other salad greens also thrive in shallow boxes with good drainage.
Medium-depth planters of 10 to 12 inches work well for flowering annuals, marigolds, petunias, and compact vegetable varieties. Bush beans and most annual flowers are comfortable in this range.
Deeper planters of 12 to 16 inches open up options for tomatoes, peppers, cucumbers, and larger flowering perennials. These plants have more extensive root systems that need the extra depth to perform well.
Very deep planters of 18 inches or more can support dwarf shrubs, ornamental grasses, and some perennials that would otherwise require in-ground planting. Succulents and drought-tolerant plants do well in almost any depth with excellent drainage and well-draining soil mix.
How to Fill a Planter Box with Soil
Never fill a planter box with native garden soil dug from your yard. Garden soil compacts heavily in a container, restricts drainage, and often introduces pests, diseases, and weed seeds.
Use a high-quality potting mix designed for container gardening. Potting mix is lightweight, drains well, and stays loose enough for roots to move through freely.
Mix in compost at roughly 20 to 30 percent of the total volume for added nutrients. This is especially important for vegetable and herb planters that need consistent fertility throughout the growing season.
Leave approximately 1 to 2 inches of space between the soil surface and the top edge of the planter. This space allows you to water generously without the water running straight off the top before it soaks in.
For vegetable planters, refresh the soil each spring by removing old plant material and mixing in fresh compost. Soil in containers depletes nutrients faster than ground soil because it is watered and fertilized repeatedly throughout the season.
How to Maintain a DIY Planter Box
At the end of each growing season, empty the planter and remove any remaining plant debris. Brush out the interior and allow it to dry fully before storing or replanting.
Check all screws and joints at the beginning of each new season. Outdoor temperature cycles and the weight of filled planters stress the joints over time. Re-tighten any loose screws and replace any that have corroded.
Inspect the wood surface for early signs of rot or deterioration. Soft spots, dark staining near joints, and surface cracking are all worth addressing promptly. Catching a single deteriorating board early means replacing one piece rather than the entire planter.
Reapply exterior sealant or finish every one to two seasons, or whenever the wood begins to look dry, faded, or unprotected. This single maintenance step does more to extend the planter’s life than any other action.
Replace the liner if it tears, stretches out of position, or begins to allow soil to wash through. A fresh liner costs very little and restores full interior wood protection.
In cold climates with hard freezes, empty wooden planters before winter and store them in a sheltered location if possible. Soil expands as it freezes and can crack or bow the planter sides over repeated freeze-thaw cycles. Keeping up with seasonal outdoor tasks is easier with a consistent plan, and the ultimate home maintenance checklist for every season is a helpful framework for organizing outdoor maintenance throughout the year.
Planter Box Safety Tips
Wear safety glasses throughout every stage of cutting, drilling, and sanding. Wood chips and dust move at unexpected speeds and angles. Hearing protection is important whenever you use a power saw or drill for an extended session.
According to the Occupational Safety and Health Administration (OSHA), eye and hearing protection are among the most important personal protective equipment items for DIY power tool use. Always follow the safety guidelines included with every tool you use.
Keep your workspace clear of tripping hazards. Sawdust on the floor is surprisingly slippery. Store sharp tools safely when they are not in your hand.
Before filling a large planter with soil, confirm it is sitting on a surface that can handle the weight. A filled planter is significantly heavier than an empty one. This is especially relevant for balcony installations, where you should verify the weight capacity of your balcony structure before placing a large, soil-filled planter.
Ensure wall-mounted window box planters are attached with hardware rated for the expected load. Verify the wall material and use appropriate anchors for secure installation.
Avoid any wood treatment, finish, or preservative near edible plants without first confirming the product is labeled safe for food-growing applications. When uncertain, use a physical liner to separate the treated wood from the soil.
When to Buy Instead of Build
Building a planter box is one of the most accessible beginner woodworking projects available. But there are situations where buying ready-made is the more practical choice.
If you need a planting solution immediately and do not have time to build, a store-bought planter gets plants in the ground today. If you are renting a home where you cannot use power tools or make modifications, a purchased planter serves the purpose without complications.
For very decorative or complex shapes with carved details, curved sides, or ornate joinery, a specialty planter from a craftsperson may deliver a result that a beginner cannot yet achieve at home.
None of this means you should not build. It simply means that the right choice depends on your specific situation. When you are ready to build, this guide will be here.
Expert Tips for a Better DIY Planter Box
Pre-seal all interior surfaces before assembly. Applying sealant to the inside faces of individual boards before you put the box together is dramatically easier than trying to brush finish into tight interior corners after assembly. Let the interior surfaces cure before building.
Use stainless steel or hot-dipped galvanized exterior screws throughout. Standard zinc-plated screws corrode in outdoor conditions and leave rust streaks on the finished surface within a season or two. The upgrade cost is minimal.
Cut drainage gaps between bottom boards rather than relying only on drilled holes. Gaps provide larger and more reliable drainage openings that stay clear even when soil shifts or presses against the bottom.
Size the planter around the root depth of the specific plants you intend to grow. A planter built for herbs does not need the same depth as one built for tomatoes. Building to the actual plant requirement saves material and keeps the planter lighter.
Add corner posts to the design even on a simple rectangular box. A 2×2 corner post at each corner makes the box significantly stronger, gives you more surface area for screws, and creates a more substantial, attractive appearance.
Do a dry assembly first without glue. Fit every piece together with screws only, check the fit, check for square, and identify any problems. Then disassemble, apply glue, and reassemble with confidence. This prevents discovering a sizing error after the glue has set.
Plan the exterior finish color to complement your outdoor furniture or home exterior. A planter box that matches or coordinates with your deck furniture or house trim looks intentional and designed rather than incidental.
If you enjoy this project and want to build complementary outdoor pieces, the skills involved in building a planter box transfer directly to similar projects like how to build a simple storage bench, which uses the same fundamental joinery techniques in a slightly larger format.
Frequently Asked Questions
Which wood species holds up best for an outdoor planter that will be watered frequently?
Cedar is the most practical choice for a frequently watered outdoor planter. Its natural oils provide genuine resistance to rot and moisture without requiring chemical treatment. In most North American climates, a well-built cedar planter box sealed with an exterior finish will last eight to fifteen years or more with basic annual maintenance. Redwood offers similar performance at a higher price point. Pine can work if sealed thoroughly and lined on the interior, but it requires more consistent maintenance than cedar to achieve comparable longevity in wet conditions.
How deep does a planter box need to be to grow tomatoes successfully?
Tomatoes need a minimum soil depth of 12 inches to develop a healthy root system, and 16 to 18 inches is better for larger indeterminate varieties that continue growing throughout the season. In a shallow planter, tomato roots hit the bottom of the box and begin circling, which stunts growth and reduces yield significantly. Compact or dwarf tomato varieties bred specifically for container growing can manage in 12 inches, but standard varieties perform much better with additional depth. Always pair deep tomato planters with robust drainage to prevent waterlogging.
Do all planter boxes need drainage holes or gaps in the bottom?
Yes, every planter box used for live plants needs drainage. Without it, excess water accumulates at the bottom of the soil column and creates anaerobic conditions that suffocate roots and promote rot. Even drought-tolerant plants like succulents need drainage because occasional overwatering without an exit point quickly becomes fatal to the plant. The only exception is a purely decorative planter used to hold a potted plant inside a decorative outer shell, where the inner pot handles drainage independently. Any planter holding soil directly must have drainage built into the base.
How do I prevent a wooden planter box from rotting at the base?
Several combined strategies work better than any single approach. First, choose rot-resistant wood like cedar or use sealed pine. Second, line the interior with landscape fabric or plastic sheeting to keep moist soil off the wood surfaces. Third, ensure drainage is adequate so water does not pool inside the box. Fourth, elevate the planter on rubber feet so the base never sits in standing water. Fifth, apply exterior sealant to all surfaces including the underside before use, and reapply every one to two seasons. Using all of these strategies together gives the planter the best possible longevity.
Is it safe to use modern pressure-treated lumber in a vegetable or herb planter?
Modern pressure-treated lumber uses copper-based preservatives, specifically ACQ (Alkaline Copper Quaternary) and similar compounds, which replaced the arsenic-based CCA treatments phased out for residential use in 2003. Current research suggests that these newer treatments present a lower risk than older products, but the discussion around their use near edible plants is ongoing. Many gardeners and extension services recommend lining the interior of a pressure-treated planter with heavy plastic sheeting to create a physical barrier between the treated wood and the soil. When in doubt, using untreated cedar or another naturally rot-resistant species for edible plant planters removes the uncertainty entirely.
How heavy does a wooden planter box get once it is filled with soil?
A filled planter box is substantially heavier than it appears when empty. A cubic foot of moist potting mix weighs approximately 50 to 60 pounds. A medium rectangular planter that is 36 inches long, 14 inches wide, and 12 inches deep holds roughly 2.5 cubic feet of soil, putting the soil weight alone at approximately 125 to 150 pounds before accounting for the wood, plants, and water. This is important for balcony placement, for deciding whether to add casters, and for planning how you will move the planter seasonally. If portability matters, keep the planter dimensions modest.
Can a complete beginner build a planter box as a first woodworking project?
A simple rectangular planter box is genuinely one of the best first woodworking projects a beginner can choose. The cuts are all straight. The joinery requires only screws and glue. No specialized techniques like mortises, dovetails, or complex joints are needed. If you can measure carefully, cut along a straight line, and drive a screw, you can build a planter box. Take your time with each step, check your measurements twice, and pre-drill every hole. The finished result is a useful, beautiful outdoor piece that you built entirely yourself, which makes it an excellent confidence-building starting point for future projects.
How do I keep soil from washing out of a planter box when I water it?
The landscape fabric liner handles this effectively. When stapled to the interior walls and base, it acts as a physical barrier that retains soil particles while allowing water to pass through freely. Without a liner, fine soil gradually washes out through the drainage gaps with every watering, especially in the first few weeks before plant roots stabilize the soil structure. If you prefer not to use fabric, a thin layer of coarse gravel or pebbles at the bottom above the drainage gaps also slows soil loss. Combining a gravel layer with a fabric liner above it gives the most complete protection.
What exterior finish lasts longest on an outdoor wooden planter?
Two coats of exterior-grade polyurethane over a properly prepared, sanded wood surface provide excellent long-term protection for outdoor planters. Oil-based polyurethane tends to be more durable than water-based versions in high-moisture situations. For a more natural look, a penetrating oil like tung oil reapplied annually also performs well. For painted finishes, a quality exterior primer followed by two coats of exterior satin paint holds up very well when maintained. The most important factor is not the specific product but consistent reapplication before the existing finish deteriorates to the point of allowing moisture to penetrate the wood.
How far apart should drainage holes be spaced in a solid planter bottom?
For a solid bottom panel with drilled drainage holes, space 1/2-inch diameter holes approximately 4 to 6 inches apart across the entire bottom surface. Include holes near the corners where water naturally collects when the planter sits on an imperfectly level surface. Clustering three or four holes near the center adds extra capacity for a larger planter. More holes of a moderate size are more effective than fewer large holes, which can allow soil to wash through more easily. Always install landscape fabric over the drilled holes before adding soil to prevent soil loss while maintaining free drainage.
How do I finish the inside of a planter box if I am growing herbs for cooking?
For an herb planter used for food production, the safest approach is to apply finish only to the exterior surfaces and leave the interior bare. Then install a landscape fabric liner or a plastic liner to create a complete barrier between the soil and the wood. This approach eliminates any concern about finish chemicals migrating into the soil. If you prefer to seal the interior wood for longevity, choose a product specifically labeled as food-safe when cured, such as certain natural oil finishes. Always read the product label carefully and allow the recommended cure time before introducing soil and edible plants.
Conclusion
Building a simple planter box is a genuinely rewarding project that delivers both immediate satisfaction and long-term value. A well-built planter gives you a growing space tailored to your exact dimensions, your chosen plants, and your outdoor style.
The keys to a successful build come down to a few core principles. Plan the dimensions and drainage design before cutting any lumber. Choose wood that suits the outdoor environment where the planter will live. Cut accurately, sand thoroughly, and assemble square. Seal and line the interior before adding any soil. Maintain the finish and hardware annually so the planter holds up season after season.
Start with a simple rectangular box. One straightforward build teaches you everything you need to know about the process. From there, you can take on a raised planter on legs, a window box, a tiered design, or a planter with a built-in trellis.
The same practical woodworking skills that go into a planter box carry over directly into other beginner-friendly home improvement builds. If this project sparks your interest in the workshop, exploring other beginner woodworking projects is a natural next step for expanding your skills and your home.