Winter Home Maintenance Checklist: Complete Guide

Introduction
Winter is the season that tests every home. Freezing temperatures stress your pipes, roof, foundation, and heating system simultaneously. Ice dams form on roof edges and push water under shingles. Snow loads press down on structures. Cold air finds every gap in your insulation and sealing. And your heating system runs almost continuously, often for the first time in months, under conditions it may not be ready to handle.
The difference between a winter that your home handles well and one that produces expensive emergency repairs almost always comes down to preparation. Homeowners who complete a thorough winter maintenance checklist before and during the cold months experience fewer failures, lower energy bills, and significantly less stress than those who take a reactive approach.
A well-prepared home is also a safer home. Carbon monoxide risks increase dramatically in winter as heating equipment runs continuously in tightly sealed spaces. House fires from heating equipment and chimney issues peak during cold months. Icy walkways create fall hazards for every member of the household. Each of these risks is manageable with the right preparation.
According to FEMA, winter storms are among the most costly and dangerous natural events in the United States, responsible for billions of dollars in property damage annually. Much of that damage occurs in homes that were not adequately prepared for winter conditions. This checklist helps ensure your home is not among them.
This complete guide covers every important winter home maintenance task, organized by priority and supported by expert insight, practical tables, cost estimates, and answers to the most common homeowner questions about cold-weather home care.
What Is a Winter Home Maintenance Checklist?
A winter home maintenance checklist is a structured set of tasks that homeowners complete before and during winter to protect their homes from cold-weather damage, maintain heating efficiency, ensure safety, and keep every home system functioning under the demands of the coldest season.
It covers both interior and exterior responsibilities. Interior tasks focus on heating systems, plumbing protection, safety devices, and energy conservation. Exterior tasks address roofing, drainage, structural components, and outdoor systems that face direct exposure to ice, snow, and freezing temperatures.
Unlike a simple to-do list, a proper winter maintenance checklist is organized by priority and timing so that the most critical protective measures are addressed first, before conditions make them urgent. Safety items and heating systems come before cosmetic or organizational tasks.
For homeowners who use a year-round maintenance approach, the winter checklist works in sequence with seasonal checklists for other times of year.
Our Fall Home Maintenance Checklist covers the preparatory steps taken before winter arrives, and this guide addresses what continues during the winter months themselves.
Why Winter Home Maintenance Is Important
Cold weather creates conditions that accelerate damage across virtually every system and surface in a home. Water that enters a crack expands by approximately 9% when it freezes, exerting force strong enough to split pipes, crack concrete, lift shingles, and widen foundation gaps. A small vulnerability in fall becomes a significant structural problem by February if it is not addressed.
Heating system failures represent one of the most common and disruptive winter emergencies. A furnace that runs adequately in November may fail under the sustained demand of January cold. When that failure happens on the coldest night of the year, emergency repair costs are highest, technician availability is lowest, and the risk to household comfort and safety is most acute.
The U.S. Department of Energy estimates that heating accounts for roughly 45% of the average American home’s annual energy expenditure. Inadequate insulation, failing weatherstripping, and unserviced heating systems drive that cost significantly higher than it needs to be. Addressing these issues proactively reduces your energy bill throughout the entire heating season.
There is also a safety dimension unique to winter. Carbon monoxide poisoning incidents increase during cold months as heating equipment runs continuously in sealed homes. House fires caused by heating equipment, chimney issues, and improper space heater use peak between December and February. A properly maintained home addresses each of these risks before they materialize.
Benefits of Winter Home Maintenance
Following a consistent winter maintenance routine delivers measurable benefits that extend through the entire cold season and into spring.
- Prevents freeze-related damage to pipes, foundations, driveways, and exterior surfaces that would require costly spring repairs
- Reduces heating costs through proper insulation, air sealing, and a heating system operating at peak efficiency
- Improves home safety by maintaining working smoke and CO detectors, servicing heating equipment, and keeping walkways clear of ice
- Prevents ice dam formation through proper attic insulation and ventilation that eliminates the conditions ice dams require
- Extends the lifespan of roofing, gutters, pipes, heating equipment, and exterior surfaces by reducing winter weather stress on each system
- Maintains indoor comfort throughout the season without the disruption and expense of emergency repairs
- Protects property value by preventing the hidden moisture, structural, and mechanical damage that deferred winter maintenance produces
- Prepares your home for spring so seasonal damage is minimized and spring maintenance tasks are straightforward rather than urgent
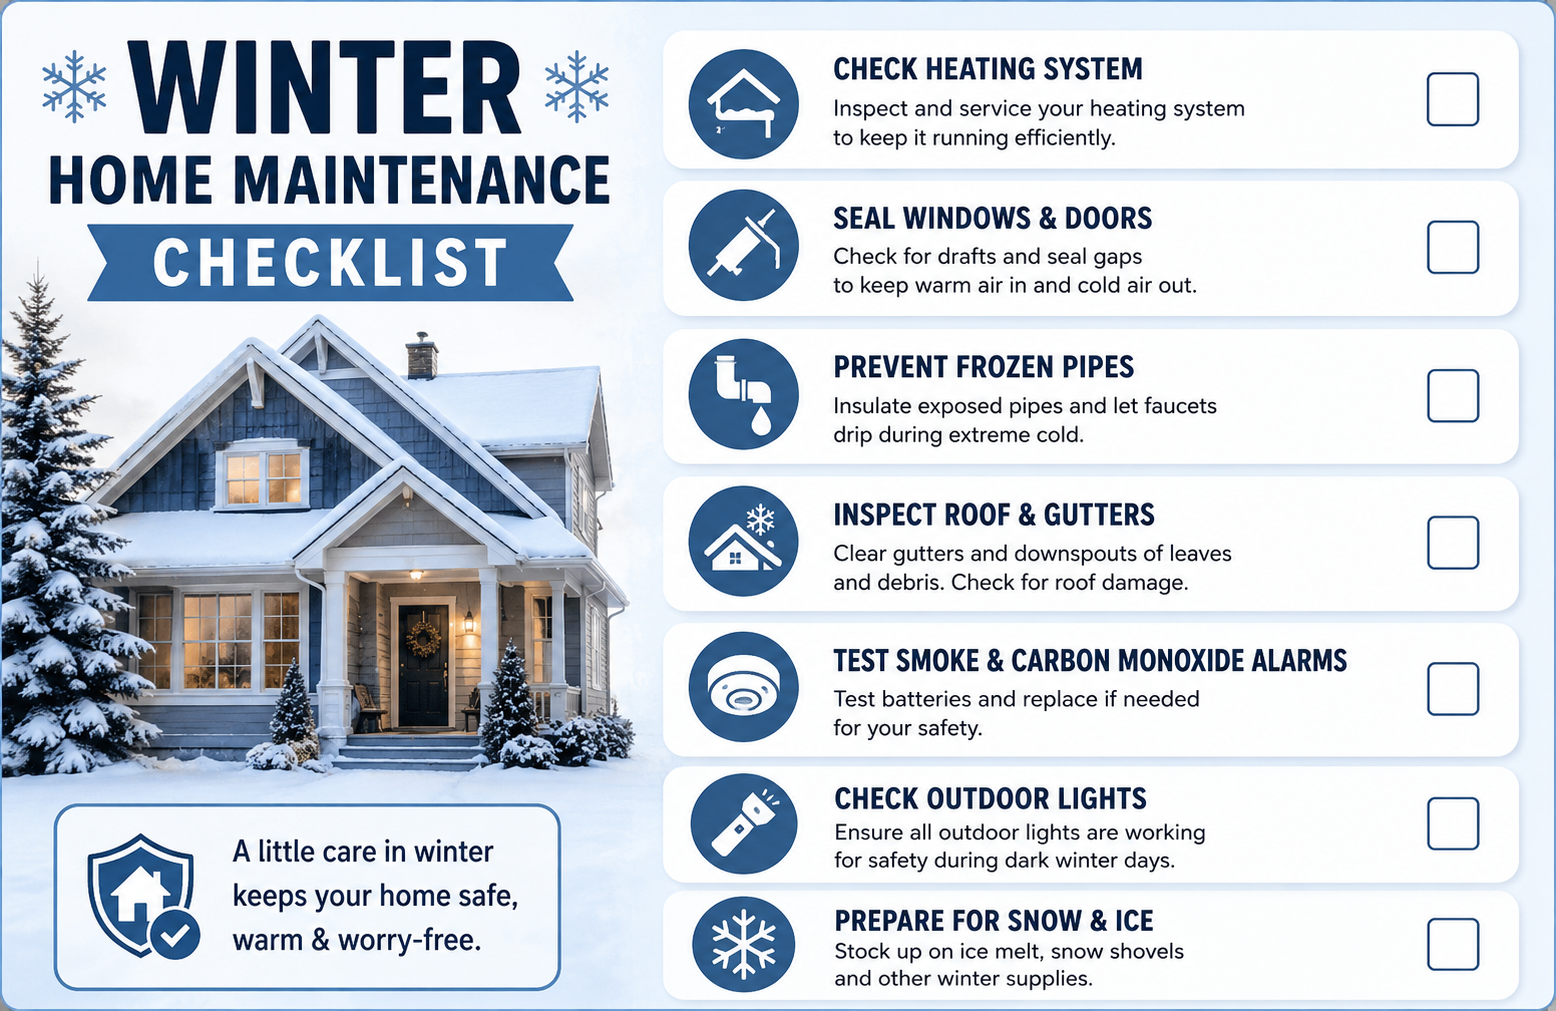
Complete Winter Home Maintenance Checklist
Work through these tasks in order of priority. Safety and heating system items come first, followed by structural protection, then exterior and organizational tasks.
Inspect the Roof for Snow and Ice Damage
Your roof faces its greatest annual challenges during winter. Heavy snow accumulation, ice formation, and the repeated freeze-thaw cycles that occur throughout the season all stress shingles, flashing, and the roof structure itself.
After any significant snowfall, monitor your roofline for signs of uneven snow melting, which can indicate heat escaping through inadequate attic insulation. Walk the perimeter of your home and use binoculars to check for lifted or displaced shingles, damaged flashing around chimneys and vents, and any sagging sections that might indicate structural stress from snow load.
Most residential roofs are engineered to handle typical regional snow loads, but roofs that have accumulated ice dam ridges combined with heavy wet snow can approach their structural limits. Know the warning signs and address them promptly.
Remove Ice Dams Safely
Ice dams are one of the most damaging winter roof problems. They form when heat escaping through inadequate attic insulation melts snow on the upper roof surface. That meltwater flows down to the cold roof edge, where it refreezes into a ridge of ice. Subsequent meltwater pools behind this ridge and eventually seeps under shingles and into your home.
If ice dams have already formed, use a roof rake with an extended handle to carefully remove snow from the lower sections of the roof while standing safely on the ground. Never climb onto an icy roof. For existing ice dam ridges, calcium chloride ice melt placed in a tube sock and laid across the ice dam creates a melt channel that allows trapped water to drain.
The long-term solution to ice dams is improving attic insulation and ventilation so that the roof surface stays uniformly cold and snow melts evenly rather than selectively.
Clean Gutters Before Heavy Snowfall
If fall gutter cleaning was not completed or if wind has deposited additional debris since fall, clearing gutters before heavy snowfall is essential. Gutters clogged with leaves and debris cannot drain properly when snow melts, and the resulting ice formation inside clogged gutters can cause them to separate from the fascia under the weight.
The ideal time for this task is during a dry stretch in late fall or early winter before the first heavy snowfall. Remove all debris and flush with a garden hose to confirm the system drains properly. Once temperatures drop consistently below freezing, climbing ladders near ice-covered roof edges becomes significantly more dangerous.
Protect Pipes from Freezing
Frozen pipes are one of the most common and most expensive winter home emergencies. When water inside a pipe freezes, it expands with enough force to split copper, crack plastic, and rupture fittings at joints. The resulting leak is not discovered until the pipe thaws, which can release large volumes of water into walls, floors, and ceilings before anyone notices.
Set your thermostat no lower than 55 degrees Fahrenheit even when the home is unoccupied. On nights when temperatures drop well below freezing, allow faucets served by pipes running through exterior walls to drip slowly. Open cabinet doors under sinks on exterior walls to allow warm air to circulate around the pipes behind them.
Know the location of your main water shut-off valve and confirm that every adult in the household knows how to operate it. In the event of a pipe burst, shutting off the main supply immediately is the single most important action you can take to minimize damage.
Insulate Exposed Pipes
Pipe insulation is one of the most cost-effective winter investments a homeowner can make. Foam pipe insulation sleeves, available at any hardware store, cost just a few dollars per linear foot and install in minutes without any special tools.
Focus on pipes in unheated areas where freeze risk is highest. This includes pipes in crawl spaces, basement utility areas along exterior walls, garage spaces adjacent to living areas, and any pipe runs through attic spaces. Measure the diameter of your pipes before purchasing insulation to ensure a proper fit, and seal any gaps at joints with foam tape to eliminate cold air exposure.
Our Home Plumbing Maintenance: Complete Guide for Homeowners covers pipe protection strategies in comprehensive detail, including both insulation installation and what to do if a pipe does freeze during an extreme cold event.
Check the Heating System
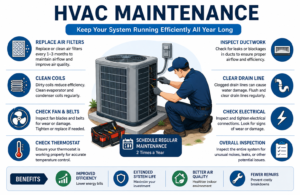
Your heating system is the most critical home system during winter. If it has not received professional service since last heating season, schedule a furnace or boiler tune-up immediately. A qualified HVAC technician will inspect burners, heat exchangers, flue connections, safety controls, and overall system performance to ensure the unit is ready for sustained winter operation.
Do not wait for a failure to confirm that the system needs attention. Heat exchangers that develop cracks are a leading source of carbon monoxide infiltration into living spaces, and this defect is only detectable through professional inspection. A cracked heat exchanger cannot be identified by any homeowner visual inspection or test button check.
Replace HVAC Filters
HVAC filter replacement is the simplest, least expensive, and most consistently neglected winter heating system maintenance task. A clogged filter restricts airflow through the system, forces the blower motor to work under unnecessary strain, reduces heating efficiency, and allows particulates to circulate through your home’s air supply throughout the winter months when ventilation is minimal.
Replace the filter at the start of heating season without exception, and check it again in January if your system runs continuously through cold months. Keep replacement filters in the correct size on hand so that when the current filter needs replacement, you can address it immediately without a hardware store trip.
Inspect the Furnace
Beyond the professional service inspection, homeowners can perform several basic furnace checks at the start of each heating season. Confirm that the area around the furnace is clear of stored items, particularly flammable materials. Check that the flue pipe connecting the furnace to the chimney or exterior vent is securely connected at every joint with no gaps or separations.
Confirm that the pilot light is burning steadily with a blue flame. A yellow or orange flame on a gas furnace can indicate combustion problems that produce elevated carbon monoxide output. If you observe this, turn off the furnace and contact your gas utility or HVAC service provider before using the unit again.
Seal Windows and Doors
Heat loss through inadequately sealed windows and doors is one of the largest contributors to inflated winter heating costs. The U.S. Department of Energy estimates that air leaks account for 25% to 40% of heating and cooling energy loss in a typical home. Addressing these gaps in winter, even after the season has begun, reduces your heating bill for every remaining cold month.
On a cold, windy day, hold a lit stick of incense near the frames of every exterior window and door. Any smoke movement indicates air infiltration. Apply fresh exterior caulk around window and door frames where gaps are identified. Replace deteriorated weatherstripping on all exterior doors. Check that door thresholds seal against the door bottom when closed.
Check Attic Insulation
Attic insulation is the primary defense against both heat loss and ice dam formation. An under-insulated attic allows heat to escape through the floor of the attic space, warming the roof deck above and creating the uneven snow melting that leads to ice dams.
Access your attic during a cold period and check whether the insulation lies level with or above the tops of the floor joists. If the joists are clearly visible, insulation depth is insufficient. The U.S. Department of Energy publishes recommended R-values for attic insulation by climate zone, which you can find at energy.gov. Adding insulation to an under-insulated attic is one of the highest-return energy efficiency investments available to homeowners in cold climates.
Test Smoke and Carbon Monoxide Detectors
Carbon monoxide risk peaks in winter when heating equipment runs continuously in tightly sealed homes. A malfunctioning furnace, water heater, or fireplace can release CO into living spaces without any odor, color, or visible indicator. Working CO detectors provide the only reliable warning of this danger.
Test every smoke detector and carbon monoxide detector in your home at the start of the heating season and monthly throughout winter. Replace batteries in any device that produces weak sound during testing. Replace any detector that is more than ten years old from the manufacturing date.
For a complete guide to testing, maintaining, and replacing smoke detectors correctly,
see our article on How to Test Smoke Detectors, which covers the full testing process including sensor spray testing, interconnected system verification, and replacement scheduling.
Inspect the Fireplace and Chimney
If you use a wood-burning fireplace or stove regularly during winter, the chimney requires annual professional inspection and cleaning. A certified chimney sweep removes creosote buildup, inspects the flue liner for cracks, checks the damper operation, and verifies that the chimney cap is intact and keeping water and animals out of the flue.
Before using your fireplace for the first fire of the season, open the damper and look up through the firebox with a flashlight to confirm the flue is open and unobstructed. Birds and squirrels occasionally nest in chimneys during warmer months, creating dangerous blockages that become fire hazards when a fire is lit below them.
Check the Water Heater
Winter places increased demand on your water heater as incoming cold water is colder than in any other season, requiring more energy to heat to your desired temperature. Inspect your water heater at the start of winter for signs of corrosion at fittings, moisture at the base of the tank, or discoloration on the tank surface that indicates internal rust.
Set the thermostat to 120 degrees Fahrenheit if it is not already at this setting. This temperature is recommended by the U.S. Department of Energy as the optimal balance of energy efficiency, bacteria prevention, and scalding risk reduction. If your water heater is more than ten years old and has not been serviced recently, schedule an inspection before the heaviest part of the heating season arrives.
Prepare an Emergency Winter Kit
Winter storms can knock out power, disable heating systems, make roads impassable, and trap households at home for days at a time. FEMA recommends that every household maintain an emergency supply kit capable of sustaining all members for a minimum of 72 hours.
A complete winter emergency kit includes water at one gallon per person per day, non-perishable food, a battery-powered or hand-crank weather radio, flashlights with extra batteries, a first aid kit, prescription medications, copies of important documents, blankets and warm clothing, cash, a manual can opener, and a portable phone charger. Add home-specific items including extra batteries for safety detectors, rock salt and sand for exterior steps, candles with safe holders, and the contact numbers for your utility company, plumber, and HVAC service provider.
Inspect Electrical Outlets and Extension Cords
Winter increases the use of space heaters, holiday lighting, and electric blankets, all of which place significant additional demand on residential electrical systems. Before the heavy use season begins, inspect every extension cord used for winter equipment and holiday decorations.
Replace any cord showing cracked, frayed, or damaged insulation rather than attempting to repair it with tape. Never run an extension cord under a rug or carpet, through a doorway gap, or beneath furniture. Space heaters should always plug directly into a wall outlet and should never be connected through an extension cord. Check that all GFCI outlets in bathrooms, kitchens, and garages are functioning by pressing the test and reset buttons on each unit.
Clean Dryer Vents
Dryer vent cleaning belongs on every seasonal maintenance checklist, but it is particularly important before winter when indoor appliance use increases and tightly sealed homes make ventilation conditions more consequential. The U.S. Fire Administration identifies clogged dryer vents as one of the leading causes of residential fires nationwide.
Disconnect the vent duct from the back of the dryer and use a long-handled brush to clear lint from the full length of the duct. Confirm that the exterior vent flap opens freely during a test cycle and closes fully when the dryer is not operating. This task takes approximately 30 minutes and eliminates one of the most preventable fire hazards in any home.
Check Basement for Moisture
Winter freeze-thaw cycles create hydrostatic pressure against foundation walls as soil freezes and thaws repeatedly. This pressure can push water through existing cracks or create new ones. Check your basement walls and floor at the start of winter and after any significant thaw period throughout the season.
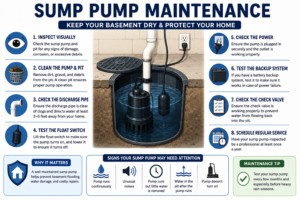
Look for new water staining on walls or floors, white efflorescence deposits indicating mineral-carrying moisture moving through the concrete, and any active seepage at wall-floor joints. A sump pump that was functioning correctly in fall should be tested by pouring water into the pit and confirming the pump activates and discharges properly before heavy winter precipitation arrives.
Inspect the Foundation
Walk the exterior perimeter of your home during a dry period in early winter and examine the foundation surface carefully. Look for new cracking, areas where the soil has pulled away from the foundation base, and any spots where grading directs water toward the foundation rather than away from it.
Pay particular attention to where downspout extensions discharge water. Discharge points should be at least six feet from the foundation wall. During winter, check that downspouts are not blocked by ice buildup that could cause water to back up against the foundation during a thaw. Minor surface cracks can be sealed with appropriate masonry products during a dry stretch, but significant or structural cracking should be evaluated by a professional.
Remove Snow from Walkways and Driveways
Clearing snow promptly after each snowfall prevents compaction and ice formation that makes removal progressively more difficult and creates serious slip hazards. Use a quality snow shovel or snow blower to clear all walkways, driveways, steps, and entry areas after every significant snowfall event.
Apply ice melt or rock salt to steps and entry areas where ice formation is likely. Be aware that some ice melt products damage concrete and can harm plants along walkway edges. Calcium chloride is effective at lower temperatures than sodium chloride and is gentler on concrete surfaces, though still potentially damaging to vegetation and metal.
Keep snow shoveled away from the home’s foundation rather than piling it against the walls, where it will eventually melt and direct large volumes of water against the foundation as spring arrives.
Winter Lawn and Tree Care
Winter lawn care requires less active attention than other seasons, but a few important tasks protect your yard through the cold months. Avoid heavy foot traffic on frozen or dormant grass, as frozen turf blades break rather than flex under pressure, creating bare patches that require reseeding in spring.
Keep trees and shrubs clear of heavy snow buildup by gently sweeping accumulated snow from branches using a broom. Wet, heavy snow on branches of deciduous and evergreen trees adds significant weight that can split limbs and damage the tree’s structure. Sweeping from below rather than shaking branches prevents ice from falling into your face and disturbs the branch as minimally as possible.
Monitor any large trees adjacent to your home for branches that develop visible cracks or splits under winter loading. Compromised branches that have not been removed pose a genuine structural risk to your roof and vehicles during winter storms.
Store Outdoor Furniture
Any outdoor furniture not stored or protected before the first hard freeze in fall should be addressed as early in winter as possible. Furniture left exposed throughout winter deteriorates significantly faster than stored items. Metal furniture oxidizes and rusts. Resin furniture becomes brittle and can crack. Wooden furniture absorbs moisture and develops mold, mildew, and rot.
Move furniture to a garage or shed if storage space allows. For large items that cannot be stored, use high-quality waterproof covers that fit securely and resist wind uplift. Elevate covered items slightly off concrete surfaces on blocks or furniture feet to prevent moisture from wicking up through the contact points throughout winter.
Protect Outdoor Faucets and Sprinkler Systems
If outdoor faucet winterization was not completed during fall maintenance, address it immediately at the start of winter before any freeze events occur. Disconnect all garden hoses, close the interior shut-off valves for each outdoor faucet, and open the exterior spigot to drain any remaining water from the line.
For irrigation systems that were not professionally winterized before the first hard freeze, contact an irrigation contractor as early in winter as possible. Even partially drained irrigation systems can sustain significant damage from a single hard freeze event. The cost of professional winterization is modest compared to the cost of replacing cracked irrigation lines, valves, and backflow preventers.
Inspect Garage Doors
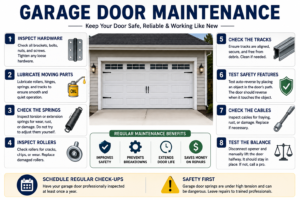
Garage doors experience increased operational stress during winter as metal hardware contracts in cold temperatures and lubricants thicken. Inspect the door’s weatherstripping around all four edges and replace any section that is cracked, torn, or failing to seal against the floor and frame.
Lubricate all metal moving parts including hinges, rollers, and springs with a lubricant rated for cold-temperature use. Standard household lubricants can gum up in freezing temperatures and actually impair rather than improve operation. Test the door’s auto-reverse safety function by placing a piece of wood flat on the floor in the path of the closing door. The door should reverse immediately upon contact.
Prevent Heat Loss Throughout the Home
Beyond window and door sealing, several additional heat loss prevention measures reduce your winter heating costs meaningfully. Install foam gaskets behind all electrical outlet and switch covers on exterior walls, which are surprisingly significant sources of cold air infiltration in many homes.
Check that all attic access hatches are insulated on the attic side and sealed at the perimeter with weatherstripping. An uninsulated attic hatch is essentially a large hole in your ceiling insulation. Confirm that all exhaust vents for bathrooms and kitchen ranges terminate outside the home rather than into the attic space, which creates moisture problems and heat loss when these common installation errors go uncorrected.
Indoor Winter Home Maintenance Checklist
Use this quick-reference checklist for all interior winter tasks:
- Schedule professional furnace or boiler service if not completed in fall
- Replace HVAC filters at the start of heating season
- Test all smoke and carbon monoxide detectors monthly
- Replace batteries in all safety devices
- Inspect chimney before first fireplace use
- Check water heater temperature and inspect for corrosion
- Insulate exposed pipes in unheated areas
- Clean dryer vent duct completely
- Test GFCI outlets in kitchens, bathrooms, and garage
- Inspect electrical cords for all space heaters and holiday lights
- Check attic insulation depth and condition
- Inspect basement walls for new moisture or cracking
- Seal electrical outlets on exterior walls with foam gaskets
- Confirm main water shut-off location is known to all household members
- Reverse ceiling fan direction to clockwise for winter heat circulation
- Check that bathroom and kitchen exhaust vents discharge outdoors
- Assemble or restock emergency winter kit
- Test sump pump by pouring water into the pit
Outdoor Winter Home Maintenance Checklist
Use this quick-reference checklist for all exterior winter tasks:
- Inspect roof after each significant snow or ice event
- Monitor roofline for uneven snow melting indicating heat loss
- Remove snow from lower roof sections with roof rake as needed
- Address ice dam formation promptly before water infiltration occurs
- Clear gutters if blocked by ice or debris
- Shovel all walkways, driveways, and steps after every snowfall
- Apply ice melt to entry steps and high-traffic walkways
- Clear snow from tree and shrub branches after heavy storms
- Inspect foundation perimeter for new cracks and drainage concerns
- Keep downspout discharge points clear of ice blockage
- Protect outdoor furniture with covers or store in garage or shed
- Confirm irrigation system winterization is complete
- Confirm outdoor faucet interior shut-off valves are closed
- Lubricate garage door hardware and inspect weatherstripping
- Check exterior lighting for burned-out bulbs and replace with LED
- Keep snow piled away from foundation walls
Winter Home Maintenance Calendar
| Month | Priority Level | Key Tasks |
|---|---|---|
| December | Critical | Furnace service if not completed, detector testing, chimney inspection, pipe insulation, emergency kit check, outlet cord safety, attic check, garage door inspection |
| January | High | Monitor roof for ice dams, prompt snow removal after storms, check basement for moisture, recheck HVAC filter, test sump pump, tree branch monitoring |
| February | Medium to High | Inspect foundation after freeze-thaw cycles, check weatherstripping for compression damage, confirm all safety devices are functioning, assess insulation performance based on heating bills, prepare spring maintenance plan |
Winter Home Maintenance Schedule
| Task | Recommended Frequency | Best Timing | Importance |
|---|---|---|---|
| Smoke and CO detector testing | Monthly | Throughout winter | Critical |
| HVAC filter check and replacement | Every 30–60 days | December, January, February | Critical |
| Snow and ice removal from walkways | After every significant event | As needed | Critical |
| Roof monitoring for ice dams | After major snow events | As needed | High |
| Heating system inspection | Annually, before season | December | Critical |
| Basement moisture inspection | Monthly | Throughout winter | High |
| Foundation perimeter check | Monthly | After freeze-thaw cycles | High |
| Dryer vent cleaning | Annually | December | High |
| Water heater inspection | Annually | December | High |
| Sump pump test | Seasonally | December and February | High |
| Garage door maintenance | Seasonally | December | Medium |
| Emergency kit restock | Annually | December | High |
| Exterior cord and outlet check | Seasonally | December | High |
Essential Winter Home Maintenance Tools
| Tool | Purpose | Recommended Use | Estimated Cost |
|---|---|---|---|
| Roof rake with extension | Removing snow from roof edges safely from ground | After heavy snowfall | $30–$80 |
| Snow shovel | Clearing walkways, steps, and driveway | After every snowfall | $20–$60 |
| Snow blower | Efficient snow removal for larger areas | After every significant snowfall | $300–$1,500 |
| Ice melt spreader | Applying ice melt evenly to walkways and steps | Throughout winter | $15–$40 |
| Pipe insulation foam | Insulating exposed pipes in unheated areas | December | $5–$20 |
| Weather radio (battery powered) | Receiving emergency weather alerts during power outages | Throughout winter | $20–$60 |
| Space heater with tip-over shutoff | Supplemental heating in specific areas | As needed | $30–$100 |
| Voltage tester | Checking outlets and extension cord safety | December | $15–$40 |
| Dryer vent brush kit | Cleaning lint from dryer vent duct | December | $15–$40 |
| Moisture meter | Detecting hidden moisture in walls and basement | Monthly checks | $20–$80 |
| Calcium chloride ice melt | Melting ice on steps and entry surfaces | Throughout winter | $15–$40 |
| Attic insulation batts or blown material | Improving attic R-value | December installation | $50–$300+ |
For a comprehensive guide to all the tools a homeowner should have on hand for year-round maintenance, see our Home Maintenance Tools Every Homeowner Needs article.
DIY vs Professional Winter Home Maintenance
| Task | DIY Friendly | Professional Recommended | Primary Reason |
|---|---|---|---|
| Snow removal from walkways | Yes | No | Straightforward with proper tools |
| Roof snow removal with roof rake | Yes | No | Can be done safely from ground level |
| Ice dam removal from roof | Partial | Yes for significant dams | Roof access in winter conditions is hazardous |
| Furnace or boiler service | No | Yes | Requires specialized equipment and certification |
| Chimney inspection and cleaning | No | Yes | Certified sweep required for flue assessment |
| HVAC filter replacement | Yes | No | Simple, inexpensive task |
| Pipe insulation installation | Yes | No | Simple foam sleeve application |
| Attic insulation addition | Partial | Yes for large projects | Proper R-value and placement require knowledge |
| Water heater inspection | Yes | Optional | Basic checks are homeowner-appropriate |
| Basement moisture inspection | Yes | Yes if seepage is active | Surface inspection is DIY; active seepage needs professional |
| Electrical outlet and cord check | Yes | Yes for panel concerns | Basic safety checks are DIY; wiring issues need electrician |
| Emergency generator installation | No | Yes | Requires proper transfer switch and permitting |
| Foundation crack repair | Minor surface cracks | Yes for structural cracks | Growing or structural cracks need professional evaluation |
| Garage door spring adjustment | No | Yes | Extreme spring tension creates serious injury risk |
Estimated Winter Home Maintenance Costs
| Category | DIY Cost Estimate | Professional Cost Estimate | Notes |
|---|---|---|---|
| Furnace or boiler service | N/A | $80–$200 | Annual service, professional required |
| Chimney inspection and cleaning | N/A | $150–$350 | Certified sweep required |
| HVAC filter replacement | $10–$30 per filter | Included in service visit | Simple DIY task |
| Pipe insulation | $20–$60 (materials) | $100–$300 | DIY installation is straightforward |
| Ice dam removal | $30–$80 (roof rake) | $300–$800+ | Professional for significant dams |
| Attic insulation improvement | $100–$400 (materials) | $500–$2,000 | Varies by current depth and square footage |
| Snow blower service | $50–$100 | $75–$150 | Annual service before first use |
| Emergency kit supplies | $50–$150 | N/A | One-time purchase with annual restock |
| Dryer vent cleaning | $15–$40 (brush kit) | $80–$150 | One-time brush kit purchase |
| Water heater inspection | $0–$20 | $75–$150 | DIY covers basic checks |
| Total winter maintenance estimate | $200–$600 DIY | $800–$3,000+ professional | Costs vary by region, home size, and condition |
Common Winter Home Maintenance Mistakes
Even prepared homeowners make avoidable errors during winter. These are the most consequential ones to watch for.
Setting the thermostat too low when away. Many homeowners lower their thermostat dramatically when traveling to reduce energy costs. Setting it below 55 degrees Fahrenheit risks pipe freezing in exterior wall cavities, which can cause catastrophic water damage. Keep the thermostat at 55 degrees minimum regardless of occupancy.
Ignoring the chimney before the first fire. Lighting the first fire of the season in an uninspected chimney is a genuine fire risk. Creosote accumulation from the previous heating season, animal nests in the flue, and flue liner damage all become hazardous when a fire is lit below them without a prior inspection.
Piling snow against foundation walls. Snow shoveled against the home’s foundation eventually melts and directs large volumes of water directly against the structure. Always shovel snow away from foundation walls and downspout areas.
Using extension cords for space heaters. This is one of the most common causes of winter electrical fires. Space heaters draw significant current and must plug directly into a properly rated wall outlet. An extension cord connection creates heat buildup at the connection point that can ignite surrounding materials.
Forgetting to insulate the attic hatch. Homeowners often improve wall and window insulation but overlook the uninsulated attic hatch, which functions as a direct heat escape point in the ceiling. An insulated cover for the attic hatch is an inexpensive and highly effective addition.
Running generators indoors or in attached garages. Every winter, homeowners die from carbon monoxide poisoning caused by portable generators operated in enclosed spaces. A generator must always operate outdoors in a fully ventilated location well away from any window, door, or vent opening.
Not maintaining a winter emergency kit. Extended power outages, severe storms, and heating failures can all require household members to shelter in place for extended periods. A complete emergency kit is not a worst-case luxury. It is a genuine safety necessity.
Money-Saving Winter Maintenance Tips
Protecting your home through winter does not require an excessive budget. These strategies reduce costs while maintaining thorough protection.
- Replace HVAC filters yourself rather than paying for this simple service during professional visits
- Purchase ice melt, pipe insulation, and emergency kit supplies before the season peaks to avoid higher seasonal pricing
- Install programmable or smart thermostat controls to optimize heating schedules and reduce energy consumption during low-occupancy periods without risking pipe freezing
- Seal electrical outlet boxes on exterior walls yourself using foam gaskets that cost only a few cents each
- Add attic insulation in phases using DIY-appropriate blown insulation kits if budget limits a full professional installation
- Keep your heating system running efficiently by clearing all supply registers of furniture, rugs, and other obstructions that block airflow and reduce distribution efficiency
- Check with your utility company for winter energy efficiency programs that may provide rebates for insulation improvements, smart thermostats, or heating system upgrades
According to the U.S. Department of Energy, homeowners who properly air seal and insulate their homes can save up to 15% on heating and cooling costs annually. The investment in winter weatherproofing consistently pays for itself within the first heating season in most cold-climate regions.
Winter Home Safety Tips
Winter introduces safety risks that require specific awareness and preparation beyond routine maintenance.
- Never use a gas oven to heat your home. This practice creates serious carbon monoxide risk and is a leading cause of winter CO poisoning incidents
- Keep fireplace screens in place whenever a fire is burning to prevent sparks from landing on carpets and furnishings
- Clear a pathway to your home’s main electrical panel, gas shut-off, and water main so these can be accessed quickly during any emergency
- Stock your vehicles with winter emergency supplies including blankets, jumper cables, a small shovel, ice scraper, and sand or cat litter for traction
- Keep entry steps and walkways clear of ice and apply sand or non-slip mat materials on high-traffic entry surfaces where ice melt may not be appropriate
- Never leave a space heater operating in a room when occupants are asleep or when children or pets are unsupervised
- Check on elderly neighbors during extreme cold events and ensure they have adequate heat, food, and safety supplies
FEMA’s Ready.gov website provides comprehensive resources for winter storm preparedness including emergency planning guides, supply kit checklists, and guidance specific to different types of winter weather events. Reviewing these resources as part of your annual winter preparation ensures your household is ready for the range of conditions that winter can produce in your region.
When You Should Hire a Professional
Some winter maintenance tasks are genuinely beyond the appropriate scope of homeowner DIY work. Recognizing these situations protects both your safety and your home.
Call a licensed professional when:
- Your heating system has not been professionally serviced and the heating season has begun
- Your chimney has not been inspected by a certified sweep before fireplace use this season
- Ice dams on your roof are large enough that removing them requires roof access during winter conditions
- Your attic shows signs of moisture damage, mold, or structural deterioration related to winter condensation
- You smell gas near any heating appliance, which requires immediate evacuation and contact with your gas utility
- Basement water infiltration is active during winter freeze-thaw cycles
- Foundation cracks have grown, shifted, or developed in a horizontal or stair-step pattern since the last inspection
- Your electrical panel shows signs of overloading from increased winter electrical demand
- A portable generator is required for power backup, which requires proper transfer switch installation by a licensed electrician
- Any pipe has frozen and you cannot safely access or thaw it without structural access to walls or floors
Expert Recommendations
After working with homeowners through many winter seasons across a range of climates and home types, certain consistent practices separate those who handle winter well from those who face repeated emergency situations.
Start your true winter maintenance in November, not December. The tasks that matter most for winter protection, including furnace service, chimney inspection, pipe insulation, and attic assessment, are all best completed before temperatures drop to the point where cold conditions affect the quality of the work and the safety of the process.
Treat carbon monoxide as the invisible winter threat it is. Unlike a roof leak or a frozen pipe, CO infiltration from a malfunctioning heating system produces no visible or audible warning. Working CO detectors in every sleeping area and on every floor of the home, tested monthly throughout winter, are not optional safety accessories. They are non-negotiable protection against one of winter’s most serious and underappreciated household risks.
Build a complete maintenance record for this winter’s tasks. Photographs, dates, and notes from your inspections provide a reference baseline for spring assessments and create documentation that is valuable for insurance claims, contractor conversations, and eventual property sale.
Plan your spring maintenance now. Walk through your home during mid-winter and note every area where winter conditions are revealing maintenance needs, whether that is a corner where cold air infiltration is more noticeable, a section of the basement wall where condensation is appearing, or a gutter that ice is backing up against. These observations become your spring maintenance roadmap when temperatures rise and conditions allow for repair work.
Frequently Asked Questions
When should I start my winter home maintenance checklist?
The most effective approach is to begin winter maintenance in early November, treating it as a continuation of your fall preparation rather than a separate season. Tasks like pipe insulation, attic inspection, and heating system service are all best completed before temperatures drop consistently below freezing and before the ground becomes frozen. Tasks like snow removal, ice dam monitoring, and basement moisture checks are ongoing throughout the season as conditions develop. If you are starting in December with nothing completed, prioritize heating system service, pipe insulation, detector testing, and emergency kit assembly before addressing anything else.
What temperature should I set my thermostat to in winter?
For comfort and energy efficiency, most HVAC professionals recommend setting the thermostat between 68 and 72 degrees Fahrenheit when the home is occupied and occupied members are active. During sleeping hours, a setting between 65 and 68 degrees is common and comfortable for most households. When leaving the home unoccupied for extended periods, never set the thermostat below 55 degrees Fahrenheit. Settings below this threshold risk pipe freezing in exterior wall cavities and unheated utility areas, particularly during extended cold snaps when outdoor temperatures drop well below freezing and remain there for multiple consecutive days.
How do I prevent ice dams on my roof?
The most effective prevention combines adequate attic insulation, proper attic ventilation, and air sealing of all attic floor penetrations. These three measures keep the roof surface uniformly cold by preventing heated indoor air from escaping into the attic and warming the roof deck selectively. When the roof surface stays cold throughout winter, snow melts evenly and flows off rather than refreezing at the eaves. Roof rakes that remove snow from the lower sections of the roof during heavy snowfall events also reduce ice dam formation by removing the material that would otherwise melt and refreeze. Heating cables installed along the eave edge address symptoms but do not address the underlying insulation and ventilation causes.
What should I do if a pipe freezes during winter?
If you suspect a pipe has frozen, turn off the main water supply immediately before attempting any thawing. This limits water damage if the pipe has already cracked. For accessible frozen pipes, apply gentle heat using a hair dryer, heating pad, or electric pipe heating tape. Work from the faucet end toward the frozen section to allow meltwater to drain. Never use an open flame, propane torch, or any open heat source near pipes. If you cannot locate or access the frozen section, or if the pipe is within a wall or ceiling cavity, contact a licensed plumber before attempting any further action.
How often should I check my pipes during a winter cold snap?
During a period of extreme cold, particularly when outdoor temperatures drop below zero degrees Fahrenheit or remain well below freezing for multiple consecutive days, check the water flow from faucets on exterior walls twice daily. Reduced flow from a previously normal faucet is the earliest indication of partial pipe freezing before a complete freeze and potential rupture occurs. During these extreme periods, leave faucets on exterior walls dripping slightly at all times to keep water moving through the line. Keep cabinet doors under exterior wall sinks open to allow warm air to circulate around the pipes behind them.
Is it safe to use a portable generator during a winter power outage?
A portable generator can be used safely during a winter power outage, but the location of operation is critical. Generators must always operate outdoors in a fully open, well-ventilated area far away from any home opening including windows, doors, dryer vents, and foundation vents. The exhaust from a generator contains lethal concentrations of carbon monoxide, and incidents of fatal CO poisoning from generators operated in garages, carports, and even outdoors near open windows occur every winter. Never operate a generator in any enclosed or semi-enclosed space, even with a door open. Install battery-operated CO detectors throughout the home before and during any generator use.
How do I know if my home has adequate attic insulation?
Access your attic on a cold day and examine the insulation layer across the attic floor. If you can clearly see the tops of the floor joists, your insulation is insufficient. Properly insulated attics have insulation that rises level with or above the tops of the joists. You can also assess insulation performance indirectly through your heating bills. If your energy costs are higher than neighbors with similar-sized homes, or if ice dams form regularly on your roofline, inadequate attic insulation is a likely contributor. The U.S. Department of Energy’s energy.gov website provides specific R-value recommendations by climate zone for accurate assessment of your home’s insulation needs.
What is the best type of ice melt for driveways and walkways?
The most effective ice melt products for different situations vary. Sodium chloride, common rock salt, is inexpensive and effective above 15 degrees Fahrenheit but can damage concrete and harm vegetation along walkway edges. Calcium chloride works at temperatures as low as minus 25 degrees Fahrenheit and is faster-acting than sodium chloride, making it preferable during extreme cold snaps. Magnesium chloride is gentler on concrete and vegetation while effective to approximately minus 13 degrees Fahrenheit. Sand does not melt ice but provides effective traction on icy surfaces without any chemical damage risk. For steps near planted areas or concrete less than three years old, magnesium chloride or sand is preferable to sodium chloride.
Can I add attic insulation myself without professional help?
Adding attic insulation is a DIY-appropriate project for many homeowners, particularly when adding blown cellulose or fiberglass insulation over existing material using a rental blower machine. Most home improvement stores rent insulation blowers and provide guidance on calculating how much material you need for your target R-value. The primary considerations are wearing appropriate protective gear including a respirator and eye protection, sealing all attic floor penetrations before adding insulation to prevent air leaks, and avoiding covering soffit vents that provide essential attic ventilation. If your attic has existing moisture damage, mold, or inadequate ventilation, address these issues before adding insulation, as trapping moisture beneath new insulation creates serious long-term problems.
How do I prepare my home for a winter power outage?
Preparation for a winter power outage begins well before an outage occurs. Maintain a fully stocked emergency kit with water, food, flashlights, batteries, and warm clothing. Know how to manually operate your garage door opener without power. If you have a natural gas heating system, determine whether it can operate during a power outage. Many gas furnaces require electricity for the blower motor and ignition, meaning they will not function during a power outage even though they use gas for heat. Alternative heat sources including properly maintained wood-burning fireplaces can provide comfort during outages if the chimney is in safe condition. Never use gas ranges, charcoal grills, or camp stoves indoors for heating.
Conclusion
Winter home maintenance is not the most exciting part of homeownership. But it is one of the most consequential.
Every task in this checklist protects your home against the specific and predictable threats that cold weather brings. Insulating pipes prevents freezing damage that strikes without warning and causes enormous water damage. Servicing the heating system prevents failure during the coldest nights. Sealing windows and doors reduces the energy cost of keeping your family warm. Testing safety detectors provides protection against fire and CO risks that peak during winter. Together, these tasks build a home that handles winter safely and efficiently rather than reactively and expensively.
Start early. Complete the highest-priority tasks first. Document everything you do. Act on warning signs when you find them rather than waiting. And know when a task genuinely requires professional expertise.
A home that is properly prepared for winter is warmer, safer, more efficient, and significantly less likely to produce the kind of emergency that disrupts your household and your finances at the worst possible time of year.